When your optics run hot, the whole rack starts lying
High-density transceiver deployments are great until the thermal reality kicks in: link flaps, CRC errors climb, and suddenly everyone blames the firmware. I have watched this happen in a leaf-spine data center where optics were “in spec” on paper, yet the cooling solutions were mismatched to airflow patterns. This article helps network engineers and facilities teams choose cooling solutions that actually protect optics, including practical checks, compatibility caveats, and troubleshooting steps. You will get field-tested selection criteria, a spec comparison table, and a no-nonsense ROI view.

Why transceivers care about cooling solutions (and where heat really hides)
Optical transceivers are small thermal devices with big opinions. Even when the vendor datasheet lists an operating temperature range, the module’s internal laser driver and receiver front-end still experience localized hotspots depending on cage design, airflow direction, and nearby heat sources. In practice, cooling solutions must manage not only ambient temperature, but also module case temperature, which can diverge from the room reading by several degrees during high load. IEEE link performance stability often degrades before a complete failure, showing up as higher BER/FER and interface retrains rather than a dramatic “it died” moment.
Thermal mechanics you can measure in the real world
During deployments, I treat transceiver cooling like a mini airflow CFD problem—except I do it with a smoke pen and a thermal camera. The key variables are air velocity across the cage, cooling path continuity (no bypass gaps), and fan speed control that matches the actual heat load. If the rack has blocked cable channels or missing blanking panels, you will get recirculation: cool air enters the wrong place, and the transceiver zone becomes a tiny convection oven.
Standards and what they actually cover
IEEE 802.3 defines physical-layer behavior and electrical/optical interface expectations, but it does not guarantee thermal comfort for your specific chassis. Vendor datasheets typically specify operating temperature and sometimes recommended airflow direction/velocity; for optics, these details matter as much as wavelength and reach. For cabling and airflow best practices, facilities standards like ANSI/TIA-942-A guide data center design, including thermal and containment concepts. Use these references to frame your thermal budget, then validate with measurements on your rack.
References: [Source: IEEE 802.3] [Source: ANSI/TIA-942-A] [Source: vendor transceiver datasheets]
Pro Tip: In high-density racks, treat transceiver cages like “hot spots” not “room sensors.” If your thermal camera shows the module area rising while the aisle thermometer looks fine, you likely have bypass airflow from missing blanks or poorly aligned fan ducting—fixing containment often beats swapping optics.
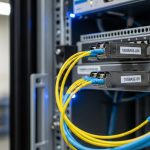
Cooling solutions for optics: airflow, containment, and module-level tactics
Cooling solutions usually fall into three layers: the room/row design, the rack airflow path, and the module environment. At the room level, you want predictable supply temperatures and stable fan behavior; at the rack level, you want containment and correct fan ducting; at the module level, you want compatibility with the cage airflow and no obstruction. In one rollout, we added blanking panels and a rear-door airflow gasket, then reduced transceiver error bursts without changing any optics.
Airflow direction and containment: the unsexy heroes
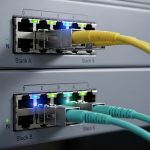
Most optics are designed for a specific airflow direction through the cage. If your chassis expects front-to-back cooling and you run a side-to-side fan wall arrangement, you can end up heating the module case even though the server “feels cold.” Containment—front-to-rear shrouds, blanking plates, and sealed cable management—prevents bypass. The result is a more uniform temperature profile across adjacent cages, which is what you want when you have 24, 36, or 48 transceivers per switch.
Rack fan curves and real heat load matching
Fan speed controllers that target generic inlet temperature can underperform when heat is concentrated near the optics. If your system ramps fans based on a sensor behind the CPU but the optics sit in a different airflow lane, the fan curve may lag. Cooling solutions that use better sensor placement or fan zoning tend to stabilize module temperature under varying traffic. I have also seen “eco mode” inadvertently increase optics stress during peak hours because the fan curve never reaches the velocity the cage needs.
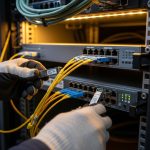
Module-level tactics: DOM, diagnostics, and monitoring
Digital Optical Monitoring (DOM) gives you real-time transceiver telemetry like temperature and bias current. The trick is using it to validate your cooling solutions, not just to impress auditors. During acceptance tests, I log DOM temperature and compare it to ambient inlet and outlet readings while ramping traffic. If you see temperature drift upward with constant ambient, your cooling path is likely blocked or recirculating.

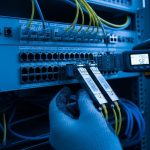
Which transceivers need which cooling: comparing common optical types
Not all transceivers behave the same under thermal stress. High-speed modules with tighter power budgets and different laser technologies can show different sensitivity to case temperature. Your cooling solutions should align with the optics class (e.g., SR vs LR, single-mode vs multimode) and the vendor’s specified thermal requirements. Below is a practical comparison of typical parameters you will see when selecting optics for dense racks.
| Transceiver example | Data rate | Wavelength | Typical reach | Connector / interface | Operating temp range (typical) | DOM availability | Cooling sensitivity note |
|---|---|---|---|---|---|---|---|
| Cisco SFP-10G-SR (example) | 10G | 850 nm | ~300 m over OM3 | LC | 0 to 70 C (varies by vendor) | Yes (common) | Moderate; case temp still matters at high ambient |
| Finisar FTLX8571D3BCL (example) | 10G | 850 nm | ~300 m over OM3 | LC | 0 to 70 C (varies) | Yes | Laser bias stability depends on airflow uniformity |
| FS.com SFP-10GSR-85 (example) | 10G | 850 nm | ~300 m over OM3 | LC | 0 to 70 C (varies) | Yes (often) | Third-party modules may have different thermal guidance |
| QSFP28 SR4 (common dense 100G use) | 100G | 850 nm | ~100 m over OM4 (typical) | LC | 0 to 70 C (varies) | Yes | Higher heat density; airflow uniformity is critical |
Reference: vendor datasheets for each model and IEEE 802.3 optical interface guidance. Always confirm exact temperature and airflow requirements per part number. IEEE 802.3 standard ANSI/TIA data center design guidance
What engineers should infer from this table
Even “similar” optics at the same wavelength can differ in thermal behavior because of cage design and internal packaging. In dense racks, the primary failure mode is often not “over max temperature,” but thermal cycling that accelerates instability. Cooling solutions that smooth airflow and reduce temperature spikes typically outperform those that only target a single ambient setpoint.
Decision checklist: picking cooling solutions for dense transceiver racks
Here is the ordered checklist I use when planning cooling solutions for high-density transceiver deployments. It works whether you are refreshing an existing pod or designing a new row.
- Distance and link type: confirm SR vs LR vs ER requirements; optics choice changes heat density and power draw.
- Switch and cage compatibility: verify the exact transceiver form factor and vendor compatibility list; some cages expect specific airflow direction.
- DOM support and telemetry: ensure the switch reads DOM fields for temperature and bias so you can validate the cooling solution.
- Operating temperature and airflow specs: compare module operating range and any vendor airflow guidance against your rack design.
- Operating temperature control strategy: choose between fan zoning, containment upgrades, or sensor placement changes based on where heat actually sits.
- Operating environment constraints: altitude, dust loading, and filter maintenance affect fan performance and real air velocity.
- Vendor lock-in risk: OEM optics can have predictable thermal behavior, while third-party may vary; plan for validation tests.
- Power and TCO: estimate total cost of ownership including failure rates, labor for swaps, and downtime impact.

Common mistakes and troubleshooting tips that save your weekend
When optics misbehave, the root cause is frequently thermal or airflow, not the transceiver itself. Here are the failure modes I have personally seen, with practical fixes. Use these to avoid the classic “swap optics until the problem disappears” strategy, which is how budgets go to die.
Missing blanking panels causing bypass airflow
Symptom: DOM temperature rises during peak traffic while inlet air temperature stays stable. Root cause: bypass paths let cool air short-circuit around the cage area. Solution: install correctly sized blanking panels, seal gaps with approved gaskets, and verify with a smoke test that airflow moves through the transceiver zone.
Fan eco mode or mismatched fan zoning
Symptom: error bursts at certain times of day, correlating with fan curve changes. Root cause: controller uses a sensor location that does not represent module airflow. Solution: adjust fan profiles or zoning so that the cage inlet gets the designed air velocity; then validate by logging DOM temperature vs traffic.
Incompatible cage airflow direction with otherwise “supported” optics
Symptom: modules pass initial burn-in but degrade faster than expected. Root cause: optics vendor expects front-to-rear cooling, but the chassis or ducting routes air differently. Solution: confirm airflow direction across the cage; re-route cables, improve ducting, and ensure the module sits in the intended airflow stream.
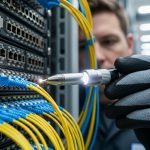
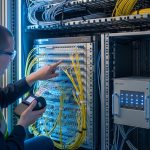
Overlooking connector and cable heat contribution
Symptom: localized warming near high-density patch panels; increased BER in specific lanes. Root cause: dense bundles can restrict airflow at the rack’s optical face, and dirty connectors can increase optical loss, raising required laser bias. Solution: clean connectors with approved methods, inspect for bent fibers, and re-balance cable management so airflow is not strangled.
Cost and ROI: what cooling upgrades usually cost (and when they pay off)
Cooling solutions can range from cheap fixes to “please approve a capital project” upgrades. In my experience, adding blanking panels, improving gasket seals, and correcting ducting is often the lowest-cost path, typically a few hundred to a few thousand dollars per rack depending on labor and parts. More involved options like rack-level fan zoning, additional containment structures, or sensor relocation can run higher, often tens of thousands per pod.
On the optics side, OEM modules may cost more upfront but can reduce field failure variance and simplify compatibility validation. Third-party optics can be cheaper, yet you may pay in labor and downtime if thermal behavior differs or if DOM telemetry behaves unexpectedly. For ROI, consider the cost of an incident: a single transceiver-related outage can burn hours of NOC time and risk SLA penalties, which usually dwarfs the price difference between a basic and a robust cooling solution.
Rule of thumb: If your DOM shows module temperatures approaching the upper operating boundary during normal traffic, cooling upgrades tend to pay back quickly by reducing instability, not by “saving power.”
FAQ: cooling solutions for high-density transceiver deployments
How do I know my cooling solutions are the real problem, not bad optics?
Start with DOM telemetry: if temperature or bias current rises with stable ambient, that points to airflow issues. Then compare behavior across adjacent cages; thermal bypass often affects whole zones rather than a single module.
Do third-party transceivers change cooling requirements?
They can. Even with the same nominal wavelength and reach, packaging and thermal guidance may differ by part number, so validate with DOM and a thermal camera after installation.
Is containment always worth it for transceiver-heavy racks?
In dense environments, yes more often than not. Containment reduces bypass airflow, which improves uniformity across cages and lowers thermal cycling stress.
What thermal data should I log during acceptance testing?
Log DOM temperature and bias (if available) per module, plus inlet and outlet rack temperatures and fan speed state. Run a traffic ramp that matches peak utilization and capture the trend, not just a single timestamp.
Can I rely on the room sensor temperature for optics decisions?
No. Room sensors can miss localized hotspots at the cage inlet, especially when cable bundles or missing blanks distort airflow paths.
What is the fastest practical fix when links flap under load?
Check airflow containment first: missing blanks, blocked ducts, and fan profile mismatches are common culprits. Then inspect connector cleanliness and optical loss, because dirty optics can increase bias and worsen thermal stress.
If you want your transceivers to behave like reliable little workhorses instead of moody divas, align cooling solutions with airflow reality: containment, correct fan behavior, and DOM-based validation. Next step: compare your current rack airflow design against your optics telemetry and run a targeted smoke plus thermal check using airflow containment best practices.
About the author: I am a field travel blogger who has deployed and debugged optics in real racks across multiple data center generations. When I am not chasing thermal gremlins, I am writing practical notes so your uptime team spends less time swapping modules and more time preventing failures.