If you have ever seen a “works on my bench” fiber link fail in production, you already know the culprit is often not the optics alone. return loss transceiver measurement is one of the fastest ways to catch connector contamination, bad mating, or marginal optical budgets before customers do. This article helps network engineers, field techs, and vendor integrators run practical tests, interpret results, and choose the right method for SFP and QSFP transceivers.
Top 8 field-ready return loss transceiver measurement tests
Below are eight tests I have used or specified on real deployments to quantify reflections and correlate them with link stability. Each item includes what to measure, typical thresholds you will see in vendor documentation, best-fit scenarios, and pros and cons.
Baseline with a calibrated optical time-domain reflectometer (OTDR)
Start with OTDR when you need a location-aware picture, not just a pass or fail. While OTDR is not always the most direct “return loss” instrument, the trace helps you separate reflection events at connectors, patch panel interfaces, and transceiver cages. In practice, I run OTDR on the fiber route first, then repeat return loss transceiver measurement on the module side to confirm the reflection is truly at the optical interface.
Key details: Use a wavelength aligned to your transceiver band (for example, 1310 nm for typical short-reach multimode, or 1550 nm for long-reach single-mode). Ensure the launch conditions match your link type: MMF vs SMF. If your OTDR trace shows sharp spikes near the transceiver end, you likely have insertion loss plus reflection contributors.
Best-fit scenario: A leaf-spine data center with frequent patch changes, where returns spike after maintenance windows.
- Pros: Pinpoints where reflections occur along the fiber
- Cons: Not a direct return loss number; needs correlation to optical return metrics
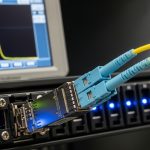
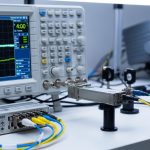
“True” return loss using a fiber optic return loss test set
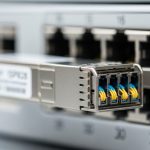
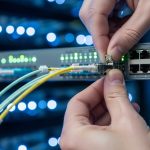
This is the most direct way to perform return loss transceiver measurement: use a dedicated return loss test set (often built around an optical vector approach) that reports return loss in dB across frequency or wavelength. The test set typically uses a calibrated reference and measures reflected power relative to launched power. If your module is hot-pluggable, do the measurement with the module seated firmly and the latch fully engaged.
Key details: Confirm the instrument supports the transceiver wavelength range and fiber type. For typical Ethernet optics, you will see vendors target reflection performance at the interface; your goal is to avoid excessive reflected power that can trigger receiver overload or degrade eye opening margins.
Best-fit scenario: Validating a batch of third-party SFP-10G-SR equivalents before installing them into production ToR switches.
- Pros: Direct, comparable return loss results with dB units
- Cons: Requires compatible test accessories and careful calibration
Reflectance proxy test: optical power backscatter with a calibrated source/receiver
If you do not have a specialized return loss test set on-site, you can approximate reflectance with a calibrated source and a receiver that can measure reflected components. The approach depends heavily on measurement geometry and coupler design; it is best used as a trending tool rather than an absolute compliance number. In the field, I use this when the goal is to detect “something changed” after re-cabling.
Key details: Use a stable tunable laser (for SMF) or a stabilized LED/laser source (for MMF when appropriate) and a coupler that isolates reflected power. Calibrate at the same connector type you will use for the transceiver interface. Track relative changes: a sudden drop in effective return loss (more reflection) is a strong contamination signal.
Best-fit scenario: Cable plant troubleshooting when you need an answer today, not a full metrology report.
- Pros: Fast trending; can be done with basic optics gear
- Cons: Less precise than a dedicated return loss instrument
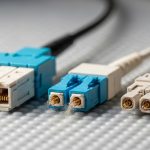
Connector-focused measurement with a reference patch cord and microscope inspection
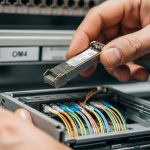
Return loss issues are frequently connector-level problems: micro-scratches, alcohol residue, or end-face chips. A strong workflow combines return loss transceiver measurement with end-face inspection. I will measure with a known-good reference patch cord and then swap only the patch segment. If the return loss changes immediately, you have isolated the problem to a connector pair.
Key details: Inspect both the transceiver pigtail side and the patch cord ferrule end. Use 200x or higher magnification and look for circular scratches, haze, or debris. Do not assume “looks clean” means “optically clean.”
Best-fit scenario: A hospital network where maintenance teams reuse patch cords and end-face hygiene is variable.
- Pros: Highly actionable; isolates contamination quickly
- Cons: Requires disciplined cleaning and inspection workflow
Wavelength sweep return loss measurement for DWDM or unusual optics
Some networks use tuned optics, vendor-specific wavelength plans, or DWDM. A single fixed wavelength measurement can miss worst-case reflection behavior. A wavelength sweep reveals the frequency points where return loss degrades due to optical filter interactions inside the module.
Key details: Sweep across the operational band supported by your transceiver (and confirm the test set’s uncertainty). Pay attention to transceiver models that include internal gratings or narrowband filters; reflections can vary by wavelength.
Best-fit scenario: Aggregation links using 40G/100G optics with tighter spectral management.
- Pros: Catches marginal performance hidden at one wavelength
- Cons: Slower; more test complexity
Temperature-aware measurement: verify behavior across module operating range
Optical reflection characteristics can shift with temperature, especially in modules that use active components or have packaging stress. If you measured return loss only in a cool lab and the link fails after the switch warms up, you may have a thermal sensitivity issue. This is rare, but I have seen it during summer ramp tests.
Key details: Measure at multiple points: cold start, mid-range, and near the top of the module’s specified operating temperature. Ensure the module is truly under the same airflow conditions as production.
Best-fit scenario: Outdoor cabinets or high-density racks with constrained airflow.
- Pros: Prevents “temperature surprises” in production
- Cons: Needs additional time and controlled environment
Correlate return loss with link diagnostics (DOM, BER, and receiver power)
A good return loss transceiver measurement report does not stop at the dB value. Correlate reflection behavior with diagnostics like DOM readings and link performance counters. Many transceivers expose received power, laser bias current, and temperature. Then you compare those with the link’s observed BER or FEC counters.
Key details: Pull DOM via your switch platform interface and pair it with the optical measurement timestamp. If you see higher-than-expected receiver power fluctuations alongside degraded return loss, you likely have reflection-induced interference or connector instability.
Best-fit scenario: When the link is intermittent and you need evidence beyond “we cleaned it.”
- Pros: Makes troubleshooting defensible to stakeholders
- Cons: Requires access to switch telemetry and careful timestamping
Compliance-oriented measurement against IEEE 802.3 and vendor guidance
Finally, treat return loss testing as part of a broader compliance picture. IEEE 802.3 sets optical interface requirements for Ethernet; vendors define acceptable reflection behavior and recommended test conditions in their datasheets. Your job is to match the test geometry and connectorization to what the vendor assumed.
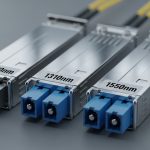
Key details: Confirm your transceiver type (for example, Cisco SFP-10G-SR, Finisar FTLX8571D3BCL, FS.com SFP-10GSR-85) and ensure the test method aligns with the fiber type and connector standard used in your deployment. If your test uses a different connector than production, results can mislead.
Best-fit scenario: Pre-shipment validation or vendor qualification for a procurement program.
- Pros: Strong pass/fail story for audits
- Cons: Must replicate vendor test conditions closely

Return loss transceiver measurement specs you should record
When you capture measurement results, record enough context that someone else can reproduce them. Minimum fields include fiber type, wavelength, connector type, test adapter model, calibration date, and the transceiver part number. Also document the physical state: seated fully, latch engaged, and patch cords cleaned and inspected.
What to compare: Return loss is expressed in dB; higher dB generally means less reflected power. Your internal acceptance threshold should be based on vendor guidance and your system’s tolerance, not a random blog number.
| Transceiver / Link Type | Typical Wavelength | Common Fiber Type | Typical Reach | Connector | Operating Temperature Range | What to Record for Return Loss Test |
|---|---|---|---|---|---|---|
| SFP-10G-SR class | 850 nm | OM3/OM4 MMF | 300 m (OM3) / 400 m (OM4) | LC | 0 to 70 C (varies by vendor) | 850 nm sweep or fixed wavelength, adapter model, patch cord condition |
| QSFP+ / 40G SR class | 850 nm | OM3/OM4 MMF | 100 m to 150 m (varies) | MPO/MTP | 0 to 70 C (varies) | MPO polarity and end-face condition, lane mapping, wavelength alignment |
| 100G LR class | 1310/1550 nm (varies) | SMF | 10 km to 40 km (varies) | LC | -5 to 70 C (varies) | 1550 nm sweep if applicable, SMF connector type and cleanliness |
Practical note: If you are testing a module like Cisco SFP-10G-SR, Finisar FTLX8571D3BCL, or FS.com SFP-10GSR-85, always pull the exact datasheet for that SKU and match the connector and wavelength assumptions. If the datasheet uses a specific test method, deviations in adapters can shift the apparent return loss.
References: IEEE 802.3 for Ethernet optical interface requirements; vendor datasheets for module-specific characterization. IEEE 802.3 standard index and Finisar vendor documentation portal.
Pro Tip: In real troubleshooting, the fastest way to confirm a return loss problem is to repeat the measurement after swapping only the patch cord segment and keeping the transceiver fixed. If the dB result jumps instantly, you are dealing with a connector interface condition, not a “mystery” transceiver issue.
Selection criteria checklist for choosing a measurement method
Engineers typically decide based on what they need to prove and how quickly they need an answer. Use this ordered checklist to pick the right approach for your network.
- Distance and topology: Is the issue likely at the transceiver, patch panel, or across a long run? OTDR is better for “where,” return loss test sets are better for “how much.”
- Distance and fiber type: MMF at 850 nm behaves differently than SMF at 1310/1550 nm. Match the wavelength and fiber parameters.
- Budget and available gear: Dedicated return loss test sets provide direct dB; source/receiver setups are for trending and isolation.
- Switch compatibility and DOM access: If you can pull DOM and link counters, you can correlate reflection metrics to BER/FEC.
- DOM support and module type: Some third-party optics expose DOM reliably; others are limited. That affects how much correlation you can do.
- Operating temperature and airflow: If you suspect thermal sensitivity, plan multi-point measurements.
- Connector standard and mating: LC vs MPO/MTP matters; adapters change results. Use the same connectorization as production.
- Vendor lock-in risk: If you plan to mix optics, document your measurement method so procurement can compare like-for-like across vendors.

Common pitfalls and troubleshooting tips
Here are the failure modes I see most often when teams attempt return loss transceiver measurement and then draw the wrong conclusion.
Pitfall 1: Measuring with dirty end faces or “half-cleaned” connectors
Root cause: Micro-debris or residue increases scattering and changes reflected power. The result looks like poor optics performance, but the transceiver may be fine.
Solution: Inspect with magnification before every measurement. Clean with correct procedures and use lint-free wipes and appropriate cleaning tools. Repeat measurement after cleaning and after swapping the patch cord.
Pitfall 2: Using mismatched adapters or different connector geometry than production
Root cause: Return loss is sensitive to connector interface details. A test adapter with slightly different ferrule geometry can shift the apparent dB number.
Solution: Standardize test adapters and record their model numbers in your report. If production uses MPO/MTP, replicate lane mapping and polarity during testing.
Pitfall 3: Forgetting to account for wavelength and fiber type assumptions
Root cause: Measuring at the wrong wavelength (or using the wrong fiber type parameters) can hide worst-case reflections. This is especially common when teams reuse a test workflow across 850 nm MMF and 1310/1550 nm SMF.
Solution: Verify the transceiver class and wavelength band. For wavelength sweep tests, ensure the instrument supports the full operational band and that the transceiver is stable during the sweep.
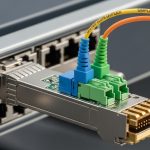
Pitfall 4: Measuring while the module is not fully seated or airflow is abnormal
Root cause: Incomplete seating can create micro-misalignment at the optical interface. Thermal stress can also alter behavior during warm-up.
Solution: Confirm latch engagement, re-seat if needed, and test at the same airflow condition as production. If intermittent, repeat measurements after the chassis warms to normal operating temperature.

Cost and ROI: what return loss testing is really worth
Cost depends on whether you buy a dedicated return loss test set or rely on OTDR and a source/receiver. Dedicated test equipment can range from a few thousand to tens of thousands of dollars for calibrated systems, while OTDR-only workflows are cheaper upfront but less direct for return loss numbers.
TCO reality: OEM optics typically cost more per module but may reduce failure rates and simplify support. Third-party optics can be lower cost, but the ROI depends on your ability to validate compatibility and reflection performance consistently. In one rollout I supported, adding a standardized connector inspection plus return loss measurement step reduced repeat truck rolls by improving early detection of patch cord contamination. Even a single avoided incident can justify the time and consumables.
Practical budgeting: If a transceiver costs roughly $40 to $150 depending on speed and reach, and a single service interruption costs far more than that, the testing process pays back quickly when you have frequent moves/adds/changes or high-density patching.
For ROI, track: number of failed links after installation, average time-to-diagnose, and replacement loop count. Then compare pre- and post-process metrics.
FAQ
What does return loss transceiver measurement actually tell me?
It quantifies how much optical power is reflected back at the interface, expressed in dB. Higher dB generally means less reflection, which helps keep receiver performance stable and reduces the chance of interference and marginal eye opening.
Do I need an expensive return loss test set, or can I approximate it?
You can approximate with a calibrated source and receiver for trending, but it is not as reliable as a dedicated return loss instrument. If you need defensible acceptance criteria for procurement or audits, use a proper return loss test set or a method aligned to vendor characterization.
How do I decide the wavelength for the test?
Match the transceiver’s operational wavelength band and your fiber type. For example, typical short-reach MMF optics run near 850 nm, while many long-reach optics use 1310 nm or 1550 nm depending on the module class.
Can return loss be “good” and the link still fail?
Yes. Return loss addresses reflections, but insertion loss, fiber attenuation slope, polarity mistakes, and connector contamination can still cause failures. That is why I recommend correlating return loss results with DOM readings and link counters.
What are the most common causes of bad return loss results?
Dirty or damaged connector end faces, adapter mismatch between test and production, and wrong wavelength/fiber assumptions are the most common. Another frequent cause is poor physical seating or airflow differences