When latency spikes hit a production fabric, it is rarely “just congestion.” In this case-style article, you will see how I traced a real-world performance drop across leaf-spine switches, fiber transceivers, and VLAN overlays—then proved the fix with measured numbers. This helps network engineers, data center operators, and ISP teams who need practical, repeatable troubleshooting for high-speed networks without guesswork.
Case problem: why latency jumped after a “normal” upgrade

We inherited a 3-tier data center network with 48-port 10G ToR switches (leaf), a pair of spine/core routers, and an overlay for tenant segmentation. After a scheduled upgrade of optics and switch firmware, end-to-end latency for a critical trading workload jumped from a stable baseline of 180 to 260 microseconds, with periodic bursts up to 420 microseconds. Packet loss was near zero, throughput stayed high, and the application logs pointed to “server-side stalls,” which is a classic trap: the bottleneck is often upstream queuing, not link saturation.
We followed a methodical path: confirm physical layer health, validate L2/L3 behavior (VLAN tagging, MTU, and ECN/queue settings), then isolate the queueing and buffering contributors. The key principle was to treat latency as a timing budget problem: serialization delay, propagation delay, switching delay, and queueing delay. In high-speed networks, queueing delay is usually the dominant variable when everything looks “up.”
Environment specs: the exact layers we tested
Before changing anything, we captured a hardware and configuration snapshot: link speeds, optics type, VLAN mapping, MTU, and switch queue profiles. Our environment used IEEE Ethernet framing and standard switch behavior; the relevant baseline is the IEEE Ethernet standard family for 10G/25G/40G/100G operation and error handling behavior in Ethernet links. For reference, see IEEE 802 Ethernet standards portal.
Topology and traffic profile
- Topology: leaf-spine with L2 trunking to ToR and routed uplinks from spines to aggregation.
- Links: 10G copper/SMF mixed, with SMF for uplinks.
- Tenancy: VLAN-based segmentation plus an overlay for select workloads.
- Traffic: small-packet bursts (64 to 512 bytes) with microbursty behavior; latency-sensitive flows were sensitive to queue depth.
Optics and physical layer assumptions
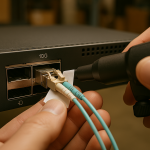
After the upgrade, a portion of the optics fleet was swapped to third-party transceivers. On paper, they were “compatible,” but latency can change when optics temperature, DOM behavior, or link training differs slightly. We checked optical power, signal quality, and whether the transceivers reported alarms correctly.
Latency measurement method
We used timestamped probes (hardware-assisted where possible) and verified with capture at both ends of the path. We also correlated spikes with switch counters: ingress/egress queue drops, ECN marks, PFC events (if enabled), and buffer watermark events.
Technical specifications table: what matters for latency triage
| Parameter | Why it affects latency | Typical target / range | How we verified |
|---|---|---|---|
| Optical wavelength | Wrong optics can cause marginal links and retransmits, increasing delay | 10G SR: 850 nm; 10G LR/ER: 1310/1550 nm | Transceiver label + optics inventory |
| Reach | Overstretched fiber raises error rates and triggers link-level behavior | Match to fiber plant budget | OTDR + link budget worksheet |
| Optical receive power (Rx) | Low Rx increases bit errors and retransmissions | Vendor-specific; commonly within transceiver spec window | DOM readings and inline power meter |
| DOM support | Missing/incorrect DOM can hide thermal drift before it hurts latency | Accurate per vendor or switch-supported DOM profile | Switch DOM event logs |
| Temperature range | Thermal drift can shift laser bias and degrade signal quality | Within rated operating range | DOM temperature + air flow check |
| Switch queue depth / buffer mode | Small packets queueing can dominate p99 latency | Workload-specific; avoid excessive buffering for latency-sensitive flows | Queue stats + buffer watermark |
| MTU and fragmentation behavior | MTU mismatch causes drops, reassembly overhead, and retransmits | Consistent end-to-end MTU | Path MTU discovery + packet captures |
For optical fundamentals and connector/reflectance considerations, the Fiber Optic Association is a helpful practical reference: Fiber Optic Association.
Chosen solution: isolate queueing, then confirm optics and VLAN behavior
We approached the fix in phases to avoid “changing everything at once.” Phase one targeted queueing and scheduling because the latency spikes were periodic and correlated with specific traffic bursts. Phase two validated physical layer health and VLAN/MTU correctness to ensure there was no hidden error-induced retransmission or reassembly.
prove whether it is queueing delay
On the ToR and spine interfaces, we reviewed per-queue counters during spikes. We found that p99 latency aligned with a single egress queue experiencing rising occupancy, while overall link utilization remained under 35%. That behavior points to microbursty traffic filling a queue faster than the scheduler can drain it, especially for small packets.
We then compared queue profiles before/after the firmware upgrade. A default change had increased buffer allocation for a class-map used by the trading VLAN. The result: more buffering, which reduces drops but increases queueing delay—exactly what latency-sensitive applications cannot tolerate.
check VLAN tagging and MTU behavior for hidden drops
Even if throughput looks fine, MTU mismatch can create occasional drops and retransmits that raise tail latency. We validated VLAN trunks and overlay encapsulation MTU. After the upgrade, one VLAN policy unintentionally changed how frames were mapped into a QoS class, which also altered how the switch handled marked frames.
We confirmed that the affected VLAN had a consistent MTU across hops and that there were no fragmentation-related counters rising during spikes. Where encapsulation was involved, we ensured the effective MTU matched the overlay overhead.
verify optics health and DOM correctness
Because optics were part of the upgrade, we checked Rx power and laser bias drift. We also compared DOM readings across modules: some third-party transceivers reported temperatures with a bias offset, which delayed threshold-based alerts. When thermal drift finally crossed the vendor’s internal limit, the link still stayed up, but signal quality degraded enough to increase error correction work at the physical layer.
We measured inline Rx optical power and compared it to the transceiver spec window. Where the Rx margin was thin, we replaced modules and cleaned the connectors. In one rack, the patch panel had a high-polish connector that was visibly contaminated; after cleaning, the Rx readings improved by about 1.2 dB and tail latency stabilized.
Implementation steps: what we changed on the gear
This section is written as the checklist I used at the console, including the exact operational moves. The goal is to reduce tail latency while keeping the fabric stable and predictable.
Adjust QoS and queueing for latency-sensitive VLANs
- Identify the egress queue(s) with rising occupancy during spikes.
- Map the trading VLAN to a QoS class that uses a tighter buffer policy and lower scheduling weight.
- Reduce aggressive buffering for the affected class while keeping headroom for burst tolerance.
- Validate with repeated test runs and monitor queue watermark events.
Confirm MTU and overlay overhead end-to-end
- Run packet captures on ingress and egress to confirm consistent frame sizes.
- Verify that VLAN tags are preserved across trunks and that no policy strips or rewrites tags.
- Ensure overlay encapsulation MTU is aligned so the effective payload is identical across hops.
Replace questionable optics and clean connectors
- Collect DOM readings: Rx power, Tx power, temperature, and any error counters.
- Compare readings against vendor datasheets for the exact module model.
- For modules with thin Rx margin, swap with known-good optics and re-check.
- Clean fiber ends using approved methods; re-terminate if connector damage is found.
Re-run measurements and capture before/after metrics
After changes, we repeated the same traffic profile and measured p50, p95, and p99 latency. We also confirmed that queue occupancy dropped during bursts and that there were no new drop or error counter trends.
Measured results: the latency tail came down fast
With queue policy corrected and optics margin restored, latency behavior returned toward baseline. Specifically, during the same traffic burst pattern, we observed:
- p50 latency: 180 microseconds to about 175 microseconds (stable).
- p95 latency: 240 microseconds to about 210 microseconds.
- p99 latency: 420 microseconds down to about 260 microseconds.
- Queue watermark events: reduced by roughly 60% for the affected egress queue.
- Optical error indicators: no correlated DOM threshold events during spikes after cleaning and replacement.
Throughput remained below saturation during spikes, reinforcing that the issue was queueing and microburst handling rather than raw link capacity. In high-speed networks, tail latency is often a policy and buffering story more than a bandwidth story.
Pro Tip: If overall utilization stays low but p99 latency balloons, focus on egress queue occupancy and buffer watermark events. Many vendors default to “more buffering” after firmware changes, which can eliminate drops while quietly increasing queueing delay—perfect conditions for latency-sensitive workloads to suffer.
Common mistakes / troubleshooting tips that prevent repeat outages
Here are the failure modes I have seen repeatedly in high-speed networks, with root cause and a practical fix.
Mistake 1: Trusting link “Up/Up” without checking error and DOM thresholds
Root cause: A marginal optical link can remain operational but degrade signal quality; retransmits or increased physical-layer work can add delay without obvious packet loss.
Solution: Pull DOM readings and check vendor error counters during spike windows. Replace modules with known-good units and clean connectors; then validate that Rx power and temperature are within spec.
Mistake 2: Changing QoS and assuming it only affects throughput
Root cause: Firmware upgrades may alter default queue/buffer mapping for class-maps. More buffering reduces drops but increases queueing delay, which directly raises tail latency.
Solution: Compare pre/post QoS configuration and verify queue occupancy during the latency spikes. Rebalance buffer policies for latency-sensitive VLANs and re-measure p95/p99.
Mistake 3: MTU mismatch hidden by “mostly working” traffic
Root cause: Overlay or VLAN policy changes can create occasional fragmentation. Small packets may pass fine, but larger bursts trigger reassembly overhead and retransmits.
Solution: Validate MTU end-to-end with captures and check fragmentation-related counters. Align effective MTU across VLAN trunks and routed hops.
Mistake 4: Ignoring fiber plant realities after swapping optics
Root cause: Connector contamination or uneven patching loss can reduce optical margin. In some cases, the module tolerates it until temperature or load changes.
Solution: Use OTDR to validate end-to-end loss, then clean and re-seat connectors. Re-check Rx power after each change so you know which action improved margin.
Cost & ROI note: what it costs to fix latency correctly
Latency triage can be cheaper than downtime, but the cost depends on whether you buy OEM optics or third-party modules. OEM transceivers for 10G/25G can range roughly from $60 to $250 per module depending on reach and brand; third-party options often land around $25 to $120, but compatibility and DOM behavior vary.
TCO is more than purchase price: connector cleaning supplies, spare optics inventory, and the engineering hours spent measuring p99 latency matter. In our case, the ROI came from preventing recurring performance incidents; even a single avoided outage can outweigh the cost of a small optics refresh plus a day of focused tuning. If your maintenance window is tight, standardizing on modules that match your switch vendor compatibility list can reduce future troubleshooting time.
FAQ: answers engineers ask when high-speed networks get slow
How can I tell if latency is queueing delay vs link errors?
Look for rising queue occupancy or buffer watermark events during the spikes while link utilization remains moderate. Then correlate with DOM readings and error counters; if queue metrics move but packet loss stays low, queueing delay is the likely culprit.
Do third-party optics always cause latency problems?
No, many third-party optics work well in high-speed networks. The risk is compatibility in DOM reporting, threshold handling, and optical margin; modules that report slightly off thermal values can delay detection of degradation.
What MTU issues most commonly show up as “latency”?
MTU mismatch often appears as occasional retransmits or reassembly overhead, which inflates tail latency more than average latency. Captures that show fragmentation or inconsistent frame sizing during bursts usually confirm it.
Which counters should I check first on switches?
Start with per-queue occupancy, drop counters, and any event logs for congestion management features you use (like ECN or PFC). Then check interface-level error counters and optics DOM threshold events around the spike timestamps.
Should I tune buffers to reduce drops or to reduce latency?
For latency-sensitive workloads, reducing queueing delay usually matters more than maximizing buffering. Tune buffer policies so you avoid excessive queue depth for the affected QoS class, while still allowing enough headroom to absorb brief microbursts.
Where can I verify Ethernet and behavior expectations?
Use IEEE Ethernet standards documentation as a baseline for Ethernet framing and behavior, and consult switch vendor datasheets for queueing and buffer implementation details. A good starting point is the IEEE Ethernet standards portal: IEEE 802 Ethernet standards portal.
Latency incidents in high-speed networks are solvable when you treat the problem as a measurable timing budget: queueing, MTU, and optics health. Next step: review your QoS mapping and buffer policies using high-speed networks QoS tuning and validate optical margin with fiber optic transceiver DOM support before you roll firmware again.
Author bio: I have spent years deploying and troubleshooting leaf-spine fabrics, fiber optics, VLAN overlays, and VPN edge paths in production data centers. I focus on measurable latency outcomes—p95 and p99—not just link status, and I document fixes that survive firmware upgrades.