When an optical link flaps, the transceiver choice matters
In a production switch stack, an Ethernet optical link that repeatedly goes down can look like a “fiber problem,” but the root cause is often a transceiver mismatch, marginal optical budget, or DOM/power behavior. This troubleshooting article helps field engineers and network admins isolate failures fast by comparing common transceiver families (SFP, SFP+, QSFP/QSFP28, and 10G/25G/100G optics) and tying symptoms to electrical and optical realities. You will learn what to measure, how to interpret vendor DOM, and how to avoid compatibility traps that drive needless downtime.
We will focus on typical Ethernet over fiber deployments aligned to IEEE 802.3 optical PHY behavior, and we will reference real module families such as Cisco SFP-10G-SR and Finisar FTLX8571D3BCL where it helps explain practical limits. For authoritative background on optical PHY requirements and link behavior, see [Source: IEEE 802.3]. For field-ready optics and operational constraints, consult each vendor’s datasheet for DOM and power class details; module examples below are illustrative.
SFP, SFP+, and QSFP/QSFP28: performance differences that affect troubleshooting
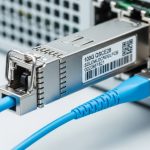
Different transceiver form factors change more than packaging: they alter lane counts, electrical interfaces, signal levels, and sometimes the way switches enforce link policies. For example, 10G SR modules use a single duplex fiber pair with a specific optical budget, while 40G QSFP+ and 100G QSFP28 typically use multi-lane parallel optics and stricter per-lane monitoring. That means a “link up” event can still hide a marginal lane that later fails under temperature drift.
In practice, your troubleshooting workflow should start by confirming the physical layer mode the switch thinks it negotiated (10GBASE-SR, 25GBASE-SR, 40GBASE-SR4, 100GBASE-SR4) and then match the transceiver type and fiber type to that mode. If you swap a module into the wrong speed/encoding expectation, you may see repeated FEC events, CRC spikes, or flapping during warm-up.
| Spec / Item | 10G SFP+ SR (Example: Cisco SFP-10G-SR) | 25G SFP28 SR (Common class) | 40G QSFP+ SR4 | 100G QSFP28 SR4 |
|---|---|---|---|---|
| Typical wavelength | 850 nm multimode | 850 nm multimode | 850 nm multimode | 850 nm multimode |
| Typical reach (OM3/OM4) | ~300 m (OM3) / ~400 m (OM4) class | ~100 m (OM3) / ~150 m (OM4) class | ~100 m (OM3) / ~150 m (OM4) class | ~100 m (OM3) / ~150 m (OM4) class |
| Fiber connector | LC duplex | LC duplex | LC MPO/MTP (4 lanes) | LC MPO/MTP (4 lanes) |
| Data rate / lanes | 10.3125 Gb/s single lane | 25.78125 Gb/s single lane | 40.625 Gb/s over 4 lanes | 103.125 Gb/s over 4 lanes |
| DOM support | Often includes temperature, Tx/Rx power | Typically includes full DOM metrics | DOM varies by vendor; watch lane-level info | DOM varies; verify per-lane behavior if exposed |
| Operating temp | Commercial or industrial options exist (check datasheet) | Commercial/industrial options exist | Check vendor range; optics can derate with heat | Check vendor range; lane failures can be heat related |
Notice how troubleshooting changes with lane count. In SR4 optics, a single dirty MPO/MTP lane can trigger CRC errors and eventual link drops even when total link status looks “mostly fine.” For SR optics at 850 nm, the optical budget is tightly linked to fiber grade (OM3 vs OM4), connector cleanliness, and patch cord length.
Pro Tip: When a 40G/100G SR4 link flaps, do not assume “the fiber is bad” before checking connector cleanliness and MPO polarity. Many field cases trace to one lane with higher insertion loss; the transceiver still initializes, then errors accumulate until the switch declares the link unhealthy.

DOM, optical power, and FEC behavior: what to read during troubleshooting
DOM (Digital Optical Monitoring) is your fastest “truth source” for many optical link issues, but only if you know what the values mean and how they behave over time. Most modern optics expose temperature and Tx/Rx power; some vendors expose bias current, laser output, and alarm thresholds. A stable Rx power at idle does not guarantee stability under load; you want to correlate power with error counters during traffic.
During troubleshooting, capture three timestamps: link-down moment, link-up moment, and the first minute after link-up. If you see Rx power trending downward while temperature rises, you may be facing a marginal optical budget or a laser bias/aging effect. If you see high Rx power but rising CRC/FEC errors, suspect fiber reflections, bad connectors, or a polarity/patching mismatch rather than “weak signal.”
Practical measurement workflow
- Step 1: Verify negotiated speed and mode on the switch (for example, ensure it is truly operating as 10GBASE-SR or 40GBASE-SR4, not a fallback mode).
- Step 2: Poll DOM: Tx power, Rx power, and temperature. Record values before and after link flap events.
- Step 3: Check error counters (CRC, FCS, or lane error metrics when available). Look for “error burst then drop” patterns.
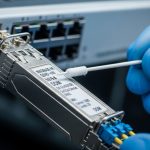
- Step 4: Inspect and clean connectors using approved optical cleaning tools. For MPO/MTP, verify polarity and cleaning of all relevant end faces.
Vendor thresholds and alarm semantics
DOM alarms are vendor-defined and can differ between module lines. Some switches also apply their own “compatibility guardrails,” such as rejecting a third-party optics class or enforcing specific vendor IDs. That is why two optics that both meet the IEEE lane rate can still behave differently in the same chassis.
For example, Finisar/FS optics families (including modules like Finisar FTLX8571D3BCL in common deployments) often provide detailed DOM that helps operators see thermal drift and optical aging. However, you still need to compare values to the vendor’s alarms and typical operating ranges in the datasheet rather than assuming a universal threshold.

Reliability vs cost: head-to-head comparison of transceiver options
For troubleshooting, the key decision is not just “which optic works today,” but which option fails gracefully and debugs quickly tomorrow. OEM optics tend to align with switch compatibility databases and may present consistent DOM behavior, while third-party optics can offer lower acquisition cost but sometimes introduce interoperability quirks. In the field, those quirks show up as DOM mismatch, stricter power control differences, or vendor-specific alarm behavior.
Below is a practical head-to-head comparison engineers use when deciding how to standardize optics across a fleet. Treat it as a reliability lens rather than a marketing comparison.
Decision matrix (engineering view)
| Option | Compatibility risk | DOM visibility | Optical budget fit | Typical street price range | TCO / failure handling |
|---|---|---|---|---|---|
| OEM optics (switch vendor) | Lowest | Highest consistency with switch tools | Aligned to switch expectations | Often higher | Lower downtime cost; easy RMA pathways |
| Major third-party (known OEM supply chain) | Medium (depends on switch model) | Good, but thresholds may differ | Usually correct if spec-matched | Mid | Good ROI if you validate against your chassis |
| Low-cost generics | Highest | Variable; alarms can be less informative | May be marginal on budget | Lowest | Higher troubleshooting time; hidden TCO |
Cost and ROI note
In many enterprise and colocation environments, a 10G SR SFP+ module often lands in a broad range depending on brand and temperature grade; a realistic planning number is often US$40 to US$150 per module for common variants, while 25G/40G/100G optics can be materially higher. The TCO difference is usually dominated by labor time for troubleshooting, truck rolls, and the operational risk of repeated link flaps.
OEM optics can cost more upfront, but if they reduce mean time to repair and avoid switch compatibility blocks, the ROI can still be favorable. Third-party optics can be cost-effective when you standardize SKUs, validate DOM behavior in a lab, and keep spares that match the exact switch models and firmware expectations.
Pro Tip: If you are building a spares strategy, test the exact third-party module SKU in the same switch model and firmware revision before you buy in bulk. Optical “spec compliance” is not the same as “switch interoperability,” especially for high lane-count optics.

Troubleshooting by compatibility: what to check before swapping optics
Many optical outages begin as a “bad transceiver” assumption, but the fastest win is to verify compatibility constraints. Switch vendors often enforce transceiver type, speed, and sometimes vendor ID allowlists. Even when the module physically fits, the switch may treat it differently for signal conditioning, DOM threshold interpretation, or auto-negotiation.
Selection checklist for trouble-free deployments
- Distance and optical budget: Match fiber grade (OM3 vs OM4 vs OS2), patch cord count, and connector loss. Use vendor reach specs as a starting point, not a guarantee.
- Switch compatibility: Confirm the optics are supported by your exact switch model and firmware. If your environment uses vendor allowlists, verify the optics will be accepted.
- DOM support and monitoring: Ensure DOM is present and that your monitoring system can read consistent fields (Tx/Rx power, alarms, temperature).
- Operating temperature and airflow: Confirm the module temperature grade matches the deployment. Hot aisles and restricted airflow can trigger derating and instability.
- Vendor lock-in risk: If you plan multi-vendor procurement, validate third-party optics behavior and alarm thresholds to avoid “works but blind” troubleshooting.
- Connector type and polarity: For MPO/MTP optics, verify polarity method and correct patching orientation end-to-end.
Common pitfalls during troubleshooting optical links (with root causes and fixes)
Below are concrete failure modes field teams repeatedly encounter. Each one maps to a distinct root cause and a practical solution you can apply during a maintenance window.
Link flaps after warm-up under sustained traffic
Root cause: Marginal optical budget or thermal derating. As temperature rises, laser bias and receiver sensitivity can shift, pushing the link beyond error tolerance. In SR4 optics, one lane can fail earlier due to slightly higher insertion loss.
Solution: Compare DOM Rx power at idle and under traffic; if Rx power margin is thin, reduce patch cord length, replace dirty connectors, and verify fiber grade (OM4 often improves margin). Confirm airflow and remove obstructions near the optics cages.
CRC/FEC errors climb while Rx power looks “normal”
Root cause: Connector contamination, fiber end-face scratches, or reflection issues. High reflections can distort received waveforms even when average power appears adequate.
Solution: Clean and inspect both ends with a fiber inspection scope. Replace any connector that shows scratches or chips. Re-seat MPO/MTP cassettes and confirm polarity orientation.
Works on one switch but not another (or only links at lower speed)
Root cause: Compatibility policies, transceiver parameter differences, or firmware-specific behaviors. Some switches apply stricter signal conditioning for certain optics classes, and third-party modules may expose slightly different timing or DOM alarm handling.
Solution: Validate optics compatibility with your exact switch model and firmware. Use the vendor’s supported optics list where available. If you must use third-party modules, standardize on SKUs that have been verified in your environment.
“Dead” link immediately after hot swap
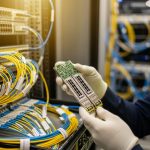
Root cause: Dirty or misaligned connector faces, or a partially seated module. Some cages require full insertion to ensure reliable electrical contacts and optical alignment.
Solution: Power-cycle only if your change control requires it; otherwise re-seat optics and re-check DOM presence. Clean connectors and confirm latch engagement. For MPO, verify the cassette is fully seated and that the polarity label matches your patch plan.
DOM alarms but no link drop until later
Root cause: Receiver margin is degrading due to aging optics or fiber changes (re-patching, new patch cords, or altered bend radius). The link can remain up until the error threshold is crossed.
Solution: Treat DOM high/low alarms as early warning tickets. Track the trend over days, not just at the moment of alarm, and schedule proactive replacement when Rx power approaches the vendor’s typical warning range.
Which option should you choose?
If you are running a high-availability campus or data center where outages have direct business impact, choose optics that are easiest to troubleshoot in your exact switch ecosystem: start with OEM modules if your budget allows, especially for 40G/100G SR4 where lane issues can be subtle. If you need cost control, choose a validated third-party SKU with proven DOM behavior and switch compatibility on your firmware. For new deployments, standardize early on a single fiber grade (often OM4 for 850 nm) and a disciplined cleaning/inspection process so that troubleshooting focuses on real electrical or optical margin rather than avoidable connector faults.
Next step: use optical_budget_planning to build an optical budget that includes patch cords, connectors, and safety margin, then pair it with your switch’s supported optics list to reduce troubleshooting cycles.
FAQ
Q: What is the first thing to check during troubleshooting an optical link flap?
A: Confirm the negotiated speed/mode and read DOM right after link-up and during the first minute of traffic. If Rx power is already near warning levels or temperature is elevated, you likely have an optical budget or thermal issue rather than a pure switch configuration problem. If Rx power is steady but CRC errors spike, focus on connector cleanliness and polarity.
Q: How can I tell whether it is a fiber problem or a transceiver problem?
A: Swap one known-good transceiver into the same port and fiber patch, then move the suspect module to a known-good port. If the issue follows the module, it is likely transceiver-related; if it follows the fiber path, it is likely fiber/connector contamination or polarity/patching. DOM trends across swaps usually make the conclusion faster.
Q: Do I need DOM for effective troubleshooting?
A: DOM is not strictly required to restore service, but it dramatically improves diagnostic speed. With DOM, you can correlate temperature and optical power to error counters and identify marginal links before they fully drop. Without DOM, you may repeatedly swap parts without understanding whether the budget is shrinking.
Q: Are third-party optics always risky?
A: Not always, but they can be risky if you have not validated them against your exact switch model and firmware. The most common issues are compatibility policies, inconsistent DOM field behavior, or marginal optical budget performance. If you standardize SKUs and test before rollout, third-party optics can be a solid cost lever.
Q: What cleaning and inspection tools are worth using?
A: A fiber inspection scope plus approved cleaning tools (swabs, wipes, and appropriate cleaning solution where permitted) pays off quickly because contamination is one of the most frequent root causes. For MPO/MTP, inspect all relevant end faces and verify polarity orientation, not just one connector side.
Q: How do I prevent repeated troubleshooting tickets after a fix?
A: After you restore service, document the root cause: DOM trends, connector condition, fiber path changes, and the exact optics SKU. Then enforce a standard process for cleaning, polarity verification, and spare module qualification so the same failure mode does not recur.
Update date: 2026-05-01
Author bio: I have hands-on experience deploying and troubleshooting Ethernet optical links in data centers and campus networks, with a focus on DOM telemetry, optical budgets, and connector hygiene. I also help teams standardize transceiver SKUs across switch generations to reduce interoperability surprises and shorten repair cycles.