When your Raspberry Pi is stuck on unreliable Wi-Fi or you need stable, low-latency connectivity for a lab or edge site, Raspberry Pi optical can be the clean answer. This guide helps network engineers and makers pick the correct transceivers, wire fiber correctly, and validate link health with repeatable checks. You will also get troubleshooting steps for the top failure points that commonly show up in field deployments.
Prerequisites: what you need before you buy a Raspberry Pi optical transceiver
Before ordering any optics, confirm the Raspberry Pi model, the interface you plan to use, and the expected distance budget. Optical links fail most often due to mismatched fiber type, wrong wavelength class, or connector damage during termination.
Hardware prerequisites
- Raspberry Pi model: verify you have an Ethernet-capable board (for example, any Pi with GbE via RJ45, or a Pi with an attached NIC via M.2/PCIe depending on your design).
- Optical media plan: decide between multimode (MMF) and single-mode (SMF) and record target distance (meters).
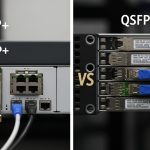
- Transceiver type: common choices are SFP/SFP+ for 1G/10G and SFP28/QSFP for higher speeds, but your Pi design may dictate form factor via the attached NIC.
- Fiber termination: LC connectors are typical for datacenter optics; confirm your patch panels and transceiver cages match.
- Switch or media converter: the optics must be compatible with the receiving equipment’s wavelength and data rate.
Network prerequisites
- VLAN plan: define the VLAN ID(s) for the Pi segment so you can isolate management and application traffic.
- Routing/VPN plan: if the Pi is an edge node, ensure your upstream router supports policy routing and IPsec or WireGuard (depending on your standard).
- Monitoring: plan to monitor link state, interface counters, and optics diagnostics (DOM if supported).
Expected outcome: you have a written distance and fiber-type budget, the correct transceiver form factor for your Pi-attached NIC, and a switch-side plan for VLAN and monitoring.
Step-by-step implementation: build a stable Raspberry Pi optical link
This section walks through a field-style deployment process. The steps include concrete actions, measured checks, and compatibility sanity checks that prevent most “it should work” failures.
Choose wavelength and fiber type based on distance
Start with the most deterministic factor: distance and fiber type. For 1G over multimode, you often see 850 nm optics; for 1G over single-mode, 1310 nm is common. For 10G SR, the typical wavelength is 850 nm with multimode fiber; for 10G LR, 1310 nm over single-mode. Use vendor datasheets and IEEE 802.3 specs to avoid assumptions; for basic Ethernet physical layer behavior, see [Source: IEEE 802.3].
Expected outcome: you select an optics class (for example, SR vs LR) that matches both your fiber plant and your required reach.
Select the correct transceiver and part number class
Transceivers are not interchangeable across wavelength classes or speed ratings. When you can, match optics to your switch vendor’s compatibility list; when you cannot, at least match the electrical and optical parameters. Common real-world examples include Cisco-style SFP optics such as Cisco SFP-10G-SR, Finisar modules like FTLX8571D3BCL for 10G SR-class behavior, and third-party equivalents such as FS.com SFP-10GSR-85 (verify exact wavelength and DOM support).
Verify power, DOM support, and temperature range
Many datacenter switches can read DOM (Digital Optical Monitoring) values like transmit power, receive power, and laser bias current. If your Pi NIC platform and your SFP cage expose those pins, you can use DOM for early failure detection. Check the module’s operating temperature range (industrial vs standard) and ensure it fits your enclosure environment.
Pro Tip: In field troubleshooting, DOM data is often the fastest way to detect a fiber polarity or connector contamination issue before the link fully flaps. If RX power is consistently low while TX power looks normal, suspect cleaning, bent fibers, or a mismatched fiber path rather than immediately replacing the transceiver.
Expected outcome: you select optics that are speed- and wavelength-matched, with a temperature rating appropriate for your deployment site.
Plan VLAN and L2 behavior before you connect fiber
On your upstream switch, configure the port for the intended VLANs and confirm whether you need tagging or untagged access. For example, if the Pi hosts a management interface and an application interface, you can use a trunk with allowed VLANs. Ensure spanning-tree settings and portfast behavior are consistent with your environment to avoid temporary outages during link negotiation.
Expected outcome: when the fiber link comes up, the Pi immediately lands in the correct broadcast domain.
Terminate fiber correctly and clean connectors
Fiber termination quality determines link reliability. Use proper LC polishing/termination tools, then clean connectors with lint-free wipes and approved cleaning supplies (follow connector manufacturer guidance). Inspect with a microscope when possible; even a minor contamination can cause high insertion loss and intermittent CRC errors.
Expected outcome: stable link with low error counters and predictable receive power.
Bring up the link and validate with measured checks
Once optics are installed, validate at three layers: physical link, Ethernet counters, and application reachability. On a Linux-based Pi, check link state and interface statistics; on the switch, verify interface counters and optics diagnostics if available. If you use routing and VPN, confirm the Pi can reach a test endpoint and that tunnel interfaces remain stable under link load.
Expected outcome: a confirmed operational optical Ethernet path with clean counters and successful end-to-end connectivity.

Key optics and transceiver specs: what to compare for Raspberry Pi optical
Engineers get burned when they compare only “speed and reach” and ignore wavelength, connector type, and diagnostics capability. Below is a practical comparison of common 1G/10G module classes you might pair with a Pi-attached NIC or a small edge media gateway.
| Module class | Typical data rate | Wavelength | Fiber type | Typical reach (reference) | Connector | DOM support | Operating temp |
|---|---|---|---|---|---|---|---|
| SFP 1G SX | 1G Ethernet | 850 nm | Multimode (MMF) | ~300 m (varies by OM) | LC | Often available | Standard to -5 to 70 C (varies) |
| SFP 1G LX | 1G Ethernet | 1310 nm | Single-mode (SMF) | Up to ~10 km (varies) | LC | Often available | Standard to -5 to 70 C (varies) |
| SFP+ 10G SR | 10G Ethernet | 850 nm | Multimode (MMF) | ~300 m typical (OM3/OM4 dependent) | LC | Often available | Standard to -5 to 70 C (varies) |
| SFP+ 10G LR | 10G Ethernet | 1310 nm | Single-mode (SMF) | ~10 km typical | LC | Often available | Standard to -5 to 70 C (varies) |
For physical-layer definitions and Ethernet optical behavior, consult [Source: IEEE 802.3]. For module electrical/optical characteristics, rely on the specific vendor datasheets for the exact part numbers you deploy.
Expected outcome: you can select an optics class confidently and verify the critical parameters before you connect anything.
Real-world deployment scenario: Raspberry Pi optical at an edge site
In a 3-tier edge setup, a field team runs a Raspberry Pi as a local telemetry collector inside a secure cabinet. The cabinet is 800 meters from the nearest aggregation switch, so the design uses single-mode fiber with an SFP 1G LX-class link at 1310 nm over LC connectors. The upstream switch ports are configured as VLAN trunk with VLAN 20 for management and VLAN 30 for application traffic, and the Pi’s interface is tagged accordingly.
During rollout, the team measures stability by checking switch interface counters for CRC and input errors and verifying DOM receive power stays within the module’s allowed range. After link bring-up, the Pi establishes an IPsec tunnel to a central router, and the operations dashboard confirms the tunnel remains stable during maintenance windows. This approach avoids Wi-Fi interference and keeps latency consistent for time-sensitive events.
Expected outcome: stable optical connectivity with predictable VLAN segmentation and reliable VPN reachability.

Selection criteria checklist: how to pick Raspberry Pi optical modules that work
Use this ordered checklist like a field worksheet. It reduces returns and avoids “wrong module” surprises.
- Distance and fiber type: choose MMF vs SMF first, then map to wavelength class (850 nm vs 1310 nm) and reach.
- Data rate and port capability: confirm the Pi-attached NIC and the switch (or media converter) both support the same Ethernet speed.
- Form factor and connector: SFP vs SFP+ vs SFP28; confirm LC vs other connector styles and cage compatibility.
- DOM and monitoring needs: if you plan to monitor power levels, ensure DOM is supported and accessible in your platform.
- Operating temperature: match module range to your cabinet conditions; consider derating if you expect high ambient temperatures.
- Switch compatibility and vendor lock-in risk: check your switch vendor compatibility guidance; third-party optics can work, but behavior varies by platform.
- Budget and total cost of ownership: compare OEM vs third-party pricing, but include expected failure rates, warranty terms, and spares strategy.
Expected outcome: a defensible procurement decision that matches engineering constraints and reduces operational risk.
Common mistakes and troubleshooting tips for Raspberry Pi optical
Below are the most frequent failure modes I see during bring-up. Each includes a root cause and a corrective action.
Link never comes up: mismatched wavelength or speed
Root cause: installing an SR (850 nm) module into a path intended for LR (1310 nm), or mixing SFP vs SFP+ capabilities across devices. Some ports will remain down without obvious errors.
Solution: verify wavelength on both ends, confirm the module speed class, and check switch port media settings. Replace the transceiver with the correct wavelength class and ensure the NIC and switch both negotiate the intended speed.
Link flaps intermittently: dirty connectors or damaged patch cords
Root cause: contaminated LC connectors, poor termination cleanliness, or a fiber that has been kinked or stressed during installation.
Solution: clean both ends using approved fiber cleaning tools, inspect with a microscope if available, and swap patch cords to isolate the failing segment. If DOM is available, watch RX power trends during link events.
Link is up but performance is poor: wrong fiber type or excessive loss
Root cause: using multimode optics on single-mode fiber, or running MMF optics over a cable plant with incorrect OM grading. Excess loss can cause high error rates even if the link negotiates.
Solution: confirm the fiber plant type (OM3/OM4 for MMF, SMF spec for SMF), measure with an OTDR or at least verify attenuation budgets with certified test results, and correct the optics/fiber pairing.
Expected outcome: you can isolate whether the issue is optics compatibility, physical layer cleanliness, or optical budget mismatch.
Cost and ROI note: balancing OEM optics vs third-party spares
Pricing varies widely by speed, reach, and DOM support, but realistic ranges for common modules are often: OEM SFP/SFP+ optics in the $80 to $250 per module range, and third-party options frequently in the $40 to $140 range. The ROI comes from spares strategy and reduced downtime: a single failed edge link can cost more than the optics delta once you include truck rolls, field labor, and service credits.
TCO also includes power and cooling assumptions. Optical modules typically draw modest power compared to switching ASICs, but higher-speed optics can increase platform power slightly. If you need industrial temperature operation (hot cabinets, outdoor enclosures), factor the cost of higher-grade modules and ensure your warranty terms match your maintenance SLA.
Expected outcome: you budget for optics in a way that reduces total incident costs, not just purchase price.
FAQ
What does Raspberry Pi optical mean in practice?
It means using a Raspberry Pi as the endpoint while carrying Ethernet over fiber using an optical transceiver (SFP/SFP+/SFP28 depending on your NIC). The Pi itself does not “generate” optical light; an attached NIC and transceiver handle the physical layer.
Can I use third-party SFP or SFP+ modules with a Pi setup?
Often yes, but compatibility depends on the NIC, cage wiring, and whether the platform expects DOM behavior. Validate with a known-good module, confirm wavelength and speed class, and test in a controlled environment before rolling out to edge sites.
How do I choose between multimode and single-mode for Raspberry Pi optical?
Choose multimode for shorter runs (typically hundreds of meters) and single-mode for longer distances (kilometers). Your decision should be driven by the actual fiber plant type and certified attenuation, not just the nominal reach listed in marketing materials.
What fiber connector should I standardize on?
LC is the most common for SFP and SFP+ optics and tends to simplify patch panel and cleaning workflows. Standardizing LC across the site reduces termination errors and makes spares more interchangeable.
Do I need DOM for reliable operations?
DOM is not strictly required for link establishment, but it is valuable for proactive maintenance. Receive power and laser bias trends help you detect contamination, aging, or budget drift before the link fails.
What is the fastest way to troubleshoot a down optical link?
First verify wavelength and speed class on both ends. Then clean and inspect connectors, swap patch cords to isolate the segment, and finally check DOM RX power or interface counters for clues.
If you want the next step, review VLAN and VPN design for edge nodes to ensure your Raspberry Pi optical link is correctly segmented and securely reachable. After that, standardize a fiber cleaning and validation workflow so every deployment behaves predictably.
Author bio: I have operated routing, switching, and fiber networks for production data centers and remote edge sites, with hands-on work validating optics, VLANs, and VPN tunnels under real maintenance constraints. I build repeatable runbooks that minimize downtime and I focus on measurable link budgets, not assumptions.