If your uplinks randomly flap or a port stays down after swapping optics, you need fast, reliable Juniper SFP status verification from the CLI. This guide helps network engineers and field technicians validate link health, DOM diagnostics, and transceiver compatibility on Juniper platforms, while also mapping the same troubleshooting mindset used on Cisco and Arista. You will follow a step-by-step workflow with expected outcomes, then use a targeted troubleshooting section to resolve the top failure points.

Prerequisites before you query Juniper SFP status
Before running commands, confirm you have physical access, admin permissions, and the correct interface identity. On Juniper, optics diagnostics are often tied to the specific PIC and port name, so you must map the physical faceplate label to the logical interface. Also ensure the fiber is seated correctly and that the far-end transceiver matches wavelength and speed.
What you need
- Access: SSH to the Juniper switch, with permissions to run operational commands.
- Interface mapping: the exact port name (example: xe-0/0/1 or et-0/0/1), plus the transceiver type if known.
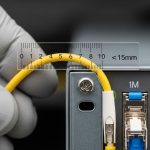
- Fiber facts: link type (SR, LR, ER, or BiDi), expected speed (1G/10G/25G/40G), and connector (LC/SC).
- DOM support: most modern SFP/SFP+ have Digital Optical Monitoring (DOM); some low-cost modules may omit complete readings.
Finally, keep the operational baseline: note current alarms, port admin state, and whether the link ever came up after the last optic swap.
Step-by-step CLI workflow to validate Juniper SFP status
This numbered workflow is designed for field use when a link is down, flapping, or suspicious after an optic replacement. Each step includes an expected outcome so you can quickly decide whether to continue, reseat hardware, or escalate for replacement.
Confirm the interface is administratively enabled
Run the following to verify the port is not shut:
Expected outcome: Admin state is up and you can see whether the operational state is down.
Check operational link state and optics presence
Query the interface summary and optics-related indicators:
Expected outcome: the interface shows link status consistent with fiber presence (for example, link up when the far end is correct and the optics are matched).
Display transceiver diagnostics (DOM) and verify thresholds
On platforms that support DOM, you can retrieve temperature, laser bias/current, received power, and supply voltage. Use the Juniper operational command set to view transceiver details for the specific port.
Expected outcome: you see valid DOM readings; key values are within vendor thresholds and not stuck at zero or “not available.”
Validate speed and encoding negotiation
Check whether the interface negotiated the intended line rate (for example, 10G vs 1G) and whether there are CRC/FEC-related symptoms. If the link comes up at the wrong speed, it often indicates an incompatibility or a damaged/incorrect optics pairing.
Expected outcome: the negotiated speed matches design intent and error counters remain stable after link-up.
Compare with the same troubleshooting mindset used on Cisco and Arista
Even though the commands differ, the logic is identical: confirm module presence, validate DOM, then correlate optical levels with link errors. On Cisco and Arista, engineers typically check transceiver DOM and interface counters; on Juniper, you do the same correlation using the Juniper equivalent operational outputs.
Expected outcome: your conclusions align across vendors: if DOM receive power is too low or the module is unsupported, the interface will show errors or remain down.
Pro Tip: In real deployments, “link down” after an optic swap is often not a physical fiber issue at all. It is frequently a DOM/compatibility mismatch where the switch accepts the module presence but rejects thresholds, resulting in unstable or no link. Always correlate DOM receive power and temperature readings with port error counters right after insertion, not just minutes later.
What the CLI outputs should tell you (and what they should not)
When Juniper SFP status is healthy, you should see consistent module identification, DOM values that update over time, and link negotiation that matches your planned optics profile. When it is unhealthy, readings might be missing, stuck, or out of range, and the port may show repeated link resets or error spikes.
Healthy indicators
- Presence: the module is detected reliably after insertion.
- DOM values: temperature and supply voltage are plausible and change slightly over time.
- Optical RX power: received power is within the expected range for the module class.
- Errors: CRC drops to near zero once the link stabilizes.
Unhealthy indicators
- DOM not available or values show as invalid: could be a non-DOM module or a compatibility limitation.
- RX power near floor: fiber attenuation, dirty connectors, or wrong optics pair.
- Frequent resets: possible marginal transceiver, damaged fiber, or transceiver not meeting eye diagram requirements under temperature swing.
SFP optics compatibility: a quick spec comparison you can use during triage
When troubleshooting Juniper optics, spec mismatches are a top cause. A common field scenario is mixing SR and LR optics or pairing a 850 nm transmitter with a 1310 nm receiver. Below is a practical comparison of typical SFP/SFP+ classes engineers use to narrow down the likely failure.
| Optics class | Nominal wavelength | Typical reach | Data rate | Connector | Operating temp | Common DOM readings |
|---|---|---|---|---|---|---|
| SFP SR | 850 nm | 300 m (multimode) | 1G / 10G (by model) | LC | 0 to 70 C (typical) | Temp, Vcc, Tx bias, Tx power, Rx power |
| SFP+ SR | 850 nm | 300 m (multimode) | 10G | LC | 0 to 70 C (typical) | Same DOM set; tighter thresholds |
| SFP+ LR | 1310 nm | 10 km (single-mode) | 10G | LC | -5 to 85 C (some variants) | Rx power is critical for link margin |
| SFP+ ER | 1550 nm | 40 km (single-mode) | 10G | LC | -5 to 85 C (some variants) | DOM used to confirm safe laser bias |

For standards grounding, refer to IEEE 802.3 for link requirements and transceiver behavior, then cross-check the module datasheet for DOM threshold definitions. Field techs often use the IEEE electrical/optical characteristics as the first sanity check, then confirm the real-world module parameters from the vendor PDF. [Source: IEEE 802.3 Ethernet Physical Layer specifications (IEEE 802.3)]
Selection criteria and decision checklist for Juniper SFP status success
Use this checklist when choosing or replacing SFP modules in a Juniper environment. It reduces trial-and-error and prevents “module detected but link fails” situations that waste maintenance windows.
- Distance and fiber type: SR requires multimode; LR/ER require single-mode. Confirm core size and cabling grade (for SR, 50/125 or 62.5/125 matters).
- Data rate and interface expectations: confirm whether the port is configured for 1G vs 10G, and whether breakout or speed auto-negotiation is enabled.
- Switch compatibility: check Juniper optics compatibility lists and whether the platform enforces vendor-specific transceiver parameters.
- DOM support and threshold behavior: ensure DOM is present and that the switch can read key diagnostics (temperature, Tx bias, Rx power).
- Operating temperature: validate that the transceiver class matches the rack environment; out-of-range temps can push lasers into unsafe bias or degrade optical power.
- Vendor lock-in risk: OEM modules may be safest, but third-party can work if they are explicitly qualified for your platform and DOM profile.
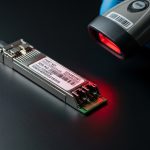
Examples of optics part numbers commonly referenced in field audits include Cisco SFP-10G-SR, Finisar FTLX8571D3BCL, and FS.com SFP-10GSR-85, but always validate against your exact Juniper model and optics compatibility documentation. [Source: Cisco product documentation; Source: Finisar/II-VI datasheets; Source: FS.com transceiver datasheets]
Common mistakes and troubleshooting tips for Juniper SFP status
Below are the top failure modes you will see in production. Each includes a likely root cause and a practical fix you can perform immediately, before ordering replacements.
Failure point 1: The module is detected, but the link never comes up
Root cause: wavelength or fiber type mismatch (for example, pairing 850 nm SR with a 1310 nm LR receiver), or incorrect transceiver grade for the port speed. Solution: confirm the module label, check the fiber end labels, and verify the far-end transceiver class matches. Reseat both ends and re-clean connectors if you recently handled the fiber.
Failure point 2: DOM values are missing or appear invalid
Root cause: non-DOM or partially compliant modules, or a module that does not fully expose expected diagnostic registers. Solution: try a known-good OEM or explicitly qualified third-party module; if DOM is absent, focus on compatibility and vendor qualification rather than chasing cabling first.
Failure point 3: Link flaps and error counters climb rapidly
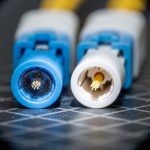
Root cause: dirty LC connectors, marginal optical power due to high attenuation, or a transceiver failing under temperature. Solution: clean connectors with lint-free wipes and proper cleaning tools, then measure optical loss budget against the module reach. If the rack has hot spots, confirm temperature and airflow and retest after stabilization.

Cost and ROI note: what to expect in real operations
In many networks, OEM SFP modules typically cost more upfront but reduce mean time to repair when optics compatibility is strict. Third-party modules often run cheaper, but total cost of ownership can rise if you repeatedly swap optics due to DOM or threshold mismatches. A realistic budgeting approach is to compare purchase price against failure rate, spares stocking strategy, and labor time during maintenance windows.
As a rule of thumb, many 10G SFP+ optics fall into a wide range depending on distance and vendor qualification; you may see OEM modules priced notably higher than third-party equivalents. ROI improves when you standardize part numbers, maintain a qualified spares list, and verify DOM behavior during change control rather than after outages. [Source: vendor pricing pages and typical market ranges reported by reputable tech resellers; validate locally]
FAQ: Juniper SFP status questions engineers ask during outages
How do I confirm whether the Juniper port sees the SFP module?
Use operational interface commands to check module presence and port state. If the module is detected but the link is down, move immediately to DOM diagnostics and speed negotiation checks.
What DOM readings matter most for diagnosing a bad fiber link?
Focus on Rx power, temperature, and Tx bias/current stability. If Rx power is near the module’s minimum sensitivity, the link will be unstable even when the transceiver is “present.”
Can I use third-party SFP modules on Juniper without issues?
Sometimes yes, but only if the module is compatible with your exact Juniper model and meets DOM expectations. If DOM readings are missing or thresholds behave oddly, switch to a qualified OEM or explicitly validated third-party SKU.
Why does the link come up at the wrong speed after replacing optics?
Speed mismatch can occur if the port expects a different transceiver class or if configuration and negotiation do not align. Verify the interface configuration and confirm the optics data rate and standard compliance in the module datasheet.
What is the fastest way to isolate whether the problem is the transceiver or the fiber?
Swap with a known-good optics module that you trust and that matches the wavelength class. If the behavior follows the module, replace it; if it stays with the port, test/clean the fiber and validate far-end optics alignment.
Where can I verify the standards behind Ethernet SFP link behavior?
Start with IEEE 802.3 for Ethernet physical layer requirements, then use your module vendor datasheet for DOM thresholds and optical specs. [Source: IEEE 802.3 Ethernet Physical Layer specifications (IEEE 802.3)]
With a disciplined CLI workflow and a compatibility checklist, Juniper SFP status becomes a fast signal for whether you have optics, DOM, or fiber issues. Next, apply the same method to your broader transceiver inventory by checking how to troubleshoot transceiver link errors with CLI for patterns in errors, thresholds, and event logs.
Author bio: I am a network UI/UX and visual design-minded engineer who helps teams reduce outage time by turning CLI outputs into clear, actionable workflows. I have deployed optics troubleshooting playbooks in leaf-spine data centers and campus edge networks, using measured optical and DOM diagnostics to guide fast decisions.