In daily field work, the fastest way to lose an SFP link is a dirty connector: intermittent LOS, rising BER, and “works on the bench, fails in the rack” behavior. This article shows how the IEC 61300-3-35 cleanliness approach maps to real SFP troubleshooting, what to measure, and how to avoid repeat failures in fiber plants and data centers. It helps operations engineers, NOC techs, and field techs who need repeatable inspection and verification steps.
Why IEC 61300-3-35 matters when SFP links go intermittent
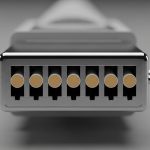
SFP transceivers are sensitive to end-face contamination because the optical power budget is tight and the fiber core alignment is unforgiving. With dust or film on the connector, you can see LOS flaps, reduced received power, and higher error rates even when the link light looks “mostly up.” The IEC 61300-3-35 family is used operationally to structure cleanliness inspection and verification so you can correlate failure events with end-face condition rather than guessing.
In practice, teams combine connector inspection (microscopy) with cleaning verification workflows. A typical SFP 1G/10G optical budget might tolerate only a few dB of extra loss; contamination can easily add more. When the link is marginal, even a small amount of residue can push the receiver below sensitivity, especially as temperature changes and link speeds renegotiate.
Real deployment snapshot: metro aggregation cabinet with mixed SFPs
In a metro aggregation site, we maintained a leaf-spine-to-aggregation topology using 10G SFP+ optics on short patch cords and 1G SFPs on legacy uplinks. After a cabinet door vibration event, several ports showed intermittent LOS and CRC spikes. Measured receive power dropped by about 2 to 4 dB compared to known-good references, and end-face inspection revealed a thin hydrocarbon film on two mating SC connectors. After cleaning and re-inspection, the ports stabilized within the next maintenance window, with CRC errors returning to baseline.
That pattern is common: contamination causes both optical attenuation and scattering, which can manifest as BER growth before the link fully drops. The key is to make the cleanliness verification repeatable using an inspection workflow aligned with IEC 61300-3-35 practices rather than relying on “looks clean” judgment.

IEC 61300-3-35-aligned verification workflow for SFP connector hygiene
Use a workflow that separates inspection, cleaning, and re-check. The goal is to avoid “clean once and hope,” which often leaves behind residue that later re-flakes. For SFP links, you should verify both the connector end faces and the mating interface condition before reconnecting.
Step-by-step checklist
- Isolate the symptom: confirm whether the fault is on one side (TX or RX) by checking link state and received power on the affected ports.
- Inspect the end faces: use a calibrated connector microscope; capture images for change tracking when possible.
- Clean correctly: follow a validated cleaning method (pre-saturated swab or cleaning cassette) matched to connector type.
- Re-inspect: verify removal of dust, fibers, and residue before mating.
- Reconnect and validate: check link up state and monitor for LOS flaps and CRC/BER trends over a short interval.
Pro Tip: In the field, the hardest contamination to remove is “invisible film” that looks glossy under low magnification but still increases scattering. Always re-inspect at the same magnification and lighting angle after cleaning; otherwise you may only be moving residue around the ferrule.
Connector cleanliness specs and practical limits (what to compare)
Teams often ask what “good” looks like, so the practical answer is to compare observed end-face condition against an inspection rubric while also monitoring optical metrics. Even if you do not have a lab-grade test bench, you can still correlate cleanliness with received power and error counters after each cleaning event.
| Parameter | Common field target | Why it matters for SFP |
|---|---|---|
| Inspection method | Connector microscope with repeatable magnification | Detects dust specks and residue that add loss/scatter |
| Connector end-face condition | No visible dust, no fiber fragments, minimal residue | Reduces insertion loss and BER growth |
| Received power change | Goal: return to baseline (often within 1 dB) | Contamination commonly causes 2 to 6 dB drops |
| Link stability | No LOS flaps over a maintenance window | Dust can intermittently block coupling |
| Temperature sensitivity | Validate after re-seat and over temperature swings | Marginal optics fail more under thermal drift |
| Operating environment | Controlled handling; dust covers used | Prevents re-contamination between inspection and mating |
For standards alignment, reference the connector cleanliness and inspection concepts in IEC 61300-3-35, and also keep general optical connector performance expectations in mind from the IEEE fiber optics ecosystem and vendor datasheets. For background on link monitoring and optical transceiver behavior, consult the transceiver and switch vendor diagnostics documentation, and the relevant Ethernet standards for error counter semantics. [Source: IEC 61300-3-35 cleanliness inspection guidance; Source: vendor switch and SFP diagnostics datasheets]

Selection criteria: choosing the right cleaning and verification approach
Even when the underlying issue is contamination, the fix depends on connector type, transceiver class, and operational constraints. Use this ordered checklist during incident response or preventive maintenance planning.
- Distance and link margin: short links may tolerate less extra loss than you expect at higher speeds; verify RX power headroom.
- Connector and ferrule type: SC, LC, MPO/MTP, and angled physical interfaces require different handling and inspection angles.
- Switch and optics compatibility: confirm DOM readings (temperature, bias current, RX power) and ensure the cleaning does not damage the ferrule coating.
- DOM support and monitoring: use transceiver DOM to detect gradual degradation; compare before/after cleaning snapshots.
- Operating temperature range: validate stability after cleaning; some sites experience fast thermal swings that expose marginal coupling.
- Vendor lock-in risk: prefer standardized cleaning media and connectors; avoid proprietary “only one brand fits” practices unless required by the connector system.
- Process repeatability: ensure the inspection magnification and lighting are consistent to support IEC 61300-3-35 style verification.
Common mistakes and troubleshooting tips for dirty SFP connectors
Below are failure modes seen repeatedly in the field, with root causes and fixes. Treat them as a rapid triage guide before swapping optics.
- Mistake: Cleaning without re-inspection.
Root cause: residue and micro-dust remain on the ferrule face.
Solution: inspect after cleaning at the same magnification; document “before/after” captures. - Mistake: Using the wrong cleaning media for connector geometry.
Root cause: swab/cassette tip does not contact the ferrule end face correctly, smearing contamination.
Solution: match cleaning method to connector type (LC vs SC vs MPO/MTP) and confirm end-face contact. - Mistake: Re-mating connectors immediately after cleaning with dust caps removed too early.
Root cause: air-borne particulates re-contaminate the face during handling.
Solution: keep caps on until the exact mating moment; minimize connector exposure time. - Mistake: Blaming the SFP without checking the patch cord ends.
Root cause: contamination sits on the cord connector, not the transceiver.
Solution: inspect both ends of the link; swap patch cords between known-good ports to isolate.
If the link still fails after verified cleaning, then check for physical damage (scratches on ferrule end face), incorrect polarity orientation for duplex fibers, and for MPO/MTP alignment issues in parallel optics.

Cost and ROI note: what it usually costs to prevent recurrence
Connector cleanliness incidents are cheap to start but expensive to repeat. A typical third-party cleaning kit plus inspection microscope can range roughly from $200 to $800 per inspection setup (depending on magnification and imaging capability), while OEM optics replacements can cost $60 to $600+ per module depending on speed and reach. TCO improves when you reduce truck rolls and minimize optic swaps: a single avoided repeat incident often justifies the inspection and cleaning workflow.
Third-party optics may reduce module purchase cost, but you still face the same cleanliness sensitivity. For ROI, prioritize inspection repeatability and documentation; that is where IEC 61300-3-35-aligned processes pay off operationally, not in paperwork alone.
FAQ
What does IEC 61300-3-35 mean in day-to-day SFP troubleshooting?
It provides a structured cleanliness inspection and verification mindset so you can prove contamination removal rather than relying on visual guesses. In practice, you correlate end-face condition with RX power and error counters before and after cleaning. [Source: IEC 61300-3-35 cleanliness inspection guidance]
Can dirty connectors cause LOS even if the SFP DOM looks normal?
Yes. DOM may not immediately reflect abrupt coupling loss, especially during intermittent contact or dust movement. Always monitor link state and error counters, then inspect both connector ends.
How often should we inspect connectors in a busy data center?
For high churn patch panels, inspect during onboarding and after any re-cabling event. For stable production links, schedule periodic checks and add inspection after any reported LOS/CRC escalation.
Which is more effective: cleaning or replacing the SFP first?
Clean and inspect first, because contamination often resides on patch cords or panel connectors. Replace only after you have verified end-face cleanliness and still