Edge computing is allergic to delay. When your workloads live near users, factories, or cameras, a few milliseconds can turn “responsive” into “why is it buffering?” This guide helps network and field teams choose optical modules that meet latency budgets while staying compatible with real switches, optics cages, and fiber runs.
Where low-latency edge traffic actually goes (and why optics matter)
In edge deployments, the critical path usually includes: traffic ingestion at the edge site, aggregation to a nearby PoP, and transport over short-reach links to a regional network. Optical modules reduce serialization delay versus copper at higher rates, and they prevent electromagnetic interference issues that can cause retransmits. IEEE 802.3 defines Ethernet PHY behavior; your module must match the expected lane rate, encoding, and power class for the host.
Latency in fiber is not just “speed of light in glass.” Practical contributors include link training, FEC mode (if applicable), transceiver warm-up behavior, and buffering inside switches. Most engineers focus on the transmission medium first: multi-mode vs single-mode, wavelength band, and reach. Then they validate that the optics work with the specific switch platform and DOM/telemetry features.
Typical edge use-case patterns
- Video analytics at the edge: 25G or 100G uplinks from edge compute racks to an aggregation switch; strict jitter targets for detection pipelines.
- Industrial control and robotics: deterministic-ish behavior requires low packet loss; optics must be stable across temperature swings.
- Retail and venue Wi-Fi backhaul: many sites, short runs, and a BOM that must stay sane; quick swaps matter.
- Telco edge micro-pop: mixed vendors, tight power budgets, and strict optics compatibility policies.
Pro Tip: In low-latency edge links, “latency” surprises teams when they ignore FEC and link mode negotiation. Verify the switch and optics support the same FEC profile (and that the link actually stays in the intended mode) rather than assuming “it negotiated 25G, so it must be fast.”

Optical module selection for low latency: specs that actually move the needle
For edge links, you usually choose modules based on data rate, fiber type, wavelength, reach, and compliance with the host’s transceiver requirements. Latency differences between SR and LR optics at the same line rate are typically dominated by switch buffering and FEC choice, but reach and error performance control retransmits—which can dwarf any raw propagation difference.
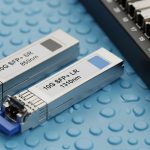
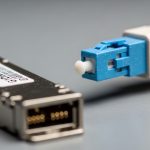
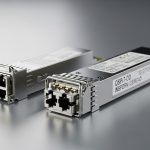
Start with the Ethernet PHY target (for example, 25G for SFP28, 10G for SFP+, or 100G for QSFP28). Then confirm the optics standard: SR (multi-mode), LR/LR4 (single-mode), and ER (longer reach). Finally, check whether the module provides DOM and whether the host supports it.
Key specs comparison (practical shortlist)
| Module type (example) | Data rate | Wavelength | Fiber type | Typical reach | Connector | Power class (typical) | Operating temp |
|---|---|---|---|---|---|---|---|
| SFP-10G-SR (example: Cisco SFP-10G-SR) | 10G | ~850 nm | OM3/OM4 multi-mode | ~300 m (OM3) / ~400 m (OM4) | LC | ~~1 W class (varies by vendor) | 0 to 70 C typical |
| SFP28-25G-SR (example: FS.com SFP-25G-SR, OM4) | 25G | ~850 nm | OM4 multi-mode | ~400-500 m class depending on spec | LC | ~~1-2 W class | -5 to 70 C common |
| SFP-25G-LR (example: Finisar/others LR) | 25G | ~1310 nm | Single-mode OS2 | ~10-20 km class | LC | ~~1-2 W class | -5 to 70 C common |
| QSFP28-100G-SR4 (example: common SR4 OM4 units) | 100G | ~850 nm (4 lanes) | OM4 multi-mode | ~100-150 m class | LC | ~~3-5 W class | 0 to 70 C typical |
Real-world note: reach numbers depend on launch conditions, fiber vendor specs, and patch cord loss. For edge sites, treat “datasheet reach” as a maximum envelope, not a guarantee. Measure and document end-to-end link budget during acceptance testing.
Latency and reliability: what to verify beyond reach
- FEC mode: confirm whether the host uses FEC for the selected optics standard and line rate.
- PCS/PMA behavior: ensure the optics support the same electrical interface expectations as the host.
- DOM telemetry: verify the host reads temperature, bias current, and received power thresholds.
- Link stability under temperature: edge sites can swing from hot cabinets to cold outdoor enclosures.

Edge deployment scenario: picking optics for a 48-port 25G rollout
Consider a 3-tier edge setup: 48-port 25G ToR switches at the edge, a nearby aggregation switch, and then an uplink to a regional core. Each edge cabinet hosts 12 compute nodes and 8 camera feeds; traffic is aggregated into four 25G uplinks per ToR. Fiber runs average 180 m from ToR to aggregation, using OM4 patching with short jumpers.
In this case, engineers typically choose 25G SFP28 SR optics for the 180 m links to avoid single-mode complexity and reduce cost. After installing, they verify link optical power and DOM alarms at the host, then run continuous traffic for a 72-hour soak test. They also check that the switch stays in the intended speed profile and that no unexpected retransmits appear under load.
If one site has longer spans—say 3 km due to building layout—they switch that pair to 25G LR on OS2 single-mode, keeping the ToR configuration consistent while using different optics per port. This hybrid approach often beats “force everything to single-mode” because it reduces trenching and patch panel churn.
Decision checklist: how engineers choose optical modules for low-latency links
Use this ordered list like a pre-flight checklist. It prevents the classic “it works in the lab, then the field laughs” situation.
- Distance and fiber type: confirm OM3/OM4 grades for SR, or OS2 for LR/ER; measure loss with an OTDR or certified tester.
- Data rate and port speed profile: match the host’s supported optics (SFP vs SFP28 vs QSFP28) and ensure the speed negotiation lands correctly.
- Switch compatibility: check the vendor optics compatibility list; some platforms enforce strict EEPROM/ID checks (especially for QSFP).
- DOM support: verify the host reads DOM fields; if DOM is disabled, you lose visibility into drift and early warnings.
- Operating temperature: match the module’s range to cabinet and outdoor conditions; verify airflow assumptions and thermal derating.
- FEC and error performance: confirm the negotiated mode; validate with traffic tests (CRC errors, FCS drops, and retransmit counters).
- Vendor lock-in risk: OEM modules may be pricey; third-party options can work but require compatibility verification for your exact switch model and firmware.
- Serviceability: plan for hot-swap behavior, labeling, and spares; field swaps should be under 5 minutes when possible.
Common mistakes and troubleshooting tips in the field
“It links up, so the optics must be fine” (but error counters disagree)
Root cause: marginal receive power due to dirty connectors, over-aggressive link budget, or a fiber grade mismatch (OM3 vs OM4). The link can still come up, but you get elevated CRC/FCS errors and occasional microbursts that hurt low-latency workloads.
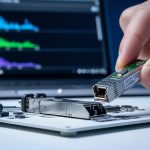
Solution: clean LC/SC connectors using approved procedures (no mystery cotton swabs), re-seat modules, and re-check DOM received power. Then run sustained traffic and watch switch counters for retransmits and CRC errors.
“The module is compatible” (until firmware changes)
Root cause: switch firmware updates can alter optics validation behavior or FEC negotiation defaults. A third-party optical module that worked last quarter might fail after an upgrade, or it might negotiate an unintended mode.
Solution: test optics compatibility after firmware changes in a staging environment. Maintain a known-good optics set per switch model and firmware version, and document supported module part numbers.
Temperature surprises in outdoor or poorly ventilated edge cabinets
Root cause: modules rated for 0 to 70 C can drift or throttle when airflow is weak or when outdoor enclosures trap heat. Bias current can rise, and received power margins shrink, leading to intermittent link resets.
Solution: verify cabinet airflow (fan curves, intake filters), measure ambient temperature near the cages, and use modules with a matching operating range. If you see resets, correlate DOM temperature and bias telemetry with link-down events.
Multi-mode SR used on the wrong fiber type
Root cause: someone labeled a cable “OM4” but it is actually older OM2/OM3, or patch cord loss is too high due to excessive connectors. The module may still link at low rates but destabilize at higher rates like 25G.
Solution: verify fiber grade with documentation and test results before installation. Use certified test reports and keep patch cord lengths short; prefer short, high-quality jumpers for SR.
Cost and ROI note: OEM vs third-party optics at the edge
In edge rollouts, optics cost is only part of the total cost of ownership (TCO). OEM modules (for example, Cisco-branded optics) can cost more upfront but often reduce compatibility risk and speed up RMA handling. Third-party optics from reputable vendors typically cost less, but you must validate compatibility with your exact switch model and firmware.
Typical market ranges vary by data rate and reach, but a pragmatic planning model is: 10G SR often costs less per port than 25G/100G, and single-mode LR tends to cost more than SR for the same port density. ROI comes from fewer truck rolls, higher uptime, and better visibility via DOM that helps you replace “drifting” optics before they fail catastrophically.
Operationally, if a single link failure at an edge site triggers a manual investigation and a field visit, the labor and downtime can outweigh the optics price difference. So budget for spares, cleaning supplies, and acceptance testing—because nothing says “fun” like troubleshooting a dirty connector at 2 a.m.

FAQ: optical modules for low-latency edge links
Which optical modules are best for short edge runs?
For short reaches over multi-mode fiber, 25G SFP28 SR or 10G SFP+ are common picks when your measured distance fits the OM3/OM4 link budget. If you have longer spans or uncertain fiber, 25G LR on single-mode OS2 can be more forgiving, though it costs more.
Do optical modules affect latency if the link negotiates correctly?
Propagation delay is small in typical edge distances; the bigger latency killers are buffering behavior and retransmits caused by errors. Choose optics that maintain clean error performance under temperature and power margin limits, and verify the negotiated FEC mode stays consistent.
How can I confirm DOM support and avoid blind debugging?
Check whether your switch platform reads standard DOM fields like temperature, bias current, and received power. Then validate in the field: pull telemetry during normal traffic and confirm alarms behave as expected before you scale to dozens of sites.
Are third-party optical modules safe to deploy?
They can be, but only after compatibility validation with your switch model and firmware. Maintain a tested part number list per platform; treat “works on my bench switch” as a hypothesis, not a fact.
What is the fastest way to troubleshoot an intermittent edge link?
Start with physical layer checks: clean and re-seat connectors, inspect patch cords, and compare DOM received power trends before link drops. Then review switch counters for CRC/FCS errors and confirm the link mode remains stable over time.
How much optical reach should I plan as margin?
Don’t plan to the datasheet edge. Use measured link loss and include margin for connector variability and aging; a common practice is to aim for substantially less than maximum rated reach, especially for higher rates like 25G.
Sources: IEEE 802.3 Ethernet PHY specifications; vendor datasheets and compatibility guidance for SFP/SFP28/QSFP28 optics (examples include Cisco SFP-10G-SR and common Finisar/FS.com optics lines). Authority links: IEEE 802.3 Ethernet and Cisco Transceiver and switching documentation.
Update date: 2026-05-01.
If you want the next step, map your edge topology to a port-by-port optics plan using how-to-size-fiber-link-budgets-for-optical-modules.
Author bio: I’ve deployed and troubleshot optical module fleets in edge micro-pops, where the “lab link” meets real dust, heat, and patch cord chaos. I write so field engineers can validate quickly, measure confidently, and avoid the classic midnight connector cleaning ritual.