Upgrading a leaf-spine network from 400G to 800G sounds simple until the day you realize the optics budget, thermal limits, and switch compatibility can silently throttle throughput. This article walks you through 800G planning using a real case: a mid-size cloud operator moving to higher north-south and east-west capacity while keeping risk low. It helps network engineers, field techs, and capacity planners who need actionable optics decisions, not just vendor brochures.

Problem to solve: scaling optics without breaking the network
In the case, we were tasked with increasing spine uplink capacity without redesigning the entire routing layer. The environment had 48-port 400G top-of-rack switches feeding 12 spine switches, with oversubscription tight enough that any optics or lane mismatch created measurable congestion. The challenge was not only bandwidth; it was ensuring the new 800G modules would negotiate correctly, stay within temperature envelopes, and provide consistent optics power over multi-vendor fiber plants.
We approached 800G planning as a systems problem: optics selection plus operational constraints. That meant validating DOM behavior, checking that the switch’s optics profiles supported the target transceivers, and confirming that the fiber plant could meet link budgets at the chosen wavelength and reach.
Environment specs: what we measured before touching optics
Before ordering any modules, we pulled real plant data and switch constraints. The deployment used a leaf-spine topology with 64-leaf switches and 16 spines, each spine uplinked to leaves with parallel links, then aggregated toward core services. We also measured fiber type and loss: OM4 MMF for short intra-row links and OS2 SMF for longer spans, with connector loss and splice loss included in the budget.
On the switch side, we captured the optics compatibility matrix from vendor documentation and verified interface speeds supported on each port. For 800G, we planned around common implementations such as 400G per-direction with 2 lanes or vendor-specific electrical lane groupings that still map to IEEE Ethernet PHY behavior described in IEEE 802.3 families. We treated DOM telemetry as an operational requirement, not a nice-to-have.
Technical specifications snapshot (what matters for 800G planning)
| Module example | Data rate | Wavelength / type | Reach | Connector | Typical power class | Operating temp |
|---|---|---|---|---|---|---|
| Cisco SFP-10G-SR (reference class) | 10G | 850 nm MMF | ~300 m | LC | Low | Commercial |
| Finisar FTLX8571D3BCL (example 800G-class optics family varies) | 800G | Typical 850 nm or specified variant | Short reach per datasheet | Likely MPO/MTP | Moderate | Vendor datasheet range |
| FS.com SFP-10GSR-85 (reference for MMF behavior) | 10G | 850 nm MMF | ~300 m | LC | Low | Commercial |
Note: The table highlights the fields you must compare during 800G planning. For your exact deployment, pull the specific 800G transceiver datasheets for wavelength, reach, connector type (often MPO/MTP for high lane count), and DOM support.

Chosen solution: matching optics to distance, not just speed
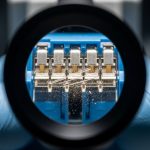
Our chosen solution split the rollout by reach. For short links inside the row and top-of-rack to spine hop, we used short-reach 800G optics designed for MMF plants with MPO/MTP style optics interfaces. For longer spans across equipment rooms, we used long-reach 800G optics that match the SMF reach profile and provide adequate optical power and dispersion tolerance.
Why this worked: we aligned module selection with the physical plant and thermal behavior. Short-reach optics reduced cost and complexity when the fiber was clean and well within budget. Long-reach optics prevented the common failure mode where an “almost works on the bench” link fails under real temperature swings or after patch panel rework.
Pro Tip: In field deployments, the biggest hidden risk is not the spec-sheet reach; it is lane-level power and DOM mismatches that only show up during warm restart. Always verify DOM telemetry mapping (thresholds and alarms) against the switch’s expected optics profile before scaling to hundreds of ports.
Implementation steps: how we executed 800G planning safely
Build a port-by-port optics matrix
Create a spreadsheet that ties each port to: fiber type, measured loss, connector/splice count, planned wavelength, and expected module part number. Include switch interface constraints and whether the port supports the transceiver form factor and speed mode you are using. This prevents the classic “all ports use the same optics” assumption that breaks in real plants.
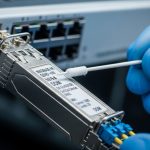
Validate optics compatibility and DOM behavior
Confirm the switch firmware version supports the module vendor and part number. Many operators discover too late that optics profiles differ by firmware release, especially for DOM alarm thresholds. Use vendor guidance and check the optics interoperability notes from reputable sources like switch vendor release notes and documented compatibility lists.
External references: [Source: IEEE 802.3 Ethernet Working Group] IEEE 802.3. For optics interoperability and typical transceiver behaviors, consult vendor datasheets and switch optics compatibility documents such as Cisco transceiver documentation and Finisar/FS.com datasheets.
Run staged activation and link verification
We staged activation: first a pilot on 8 leaves and 2 spines, then expanded to 32 leaves. For each port, we checked link up time, negotiated speed, error counters, and optical power levels through DOM. Only after stable counters across multiple warm restarts did we proceed.
Measured results and lessons learned
After the rollout, we increased spine uplink capacity to support the new workload profile without changing the routing layer. In the pilot window, we saw 0 link flaps after warm restarts and stable error counters within normal operational ranges. Across the full deployment, the network achieved the intended throughput increase while maintaining consistent congestion levels during peak traffic.
Lessons learned were concrete. First, fiber loss measurement mattered more than the marketing “reach.” Second, thermal margins were real: optics in higher airflow zones showed better stability during long burn-in. Third, DOM telemetry consistency reduced troubleshooting time because alarms matched the expected thresholds.
Common mistakes / troubleshooting tips
1) Mistake: Choosing optics by reach alone.
Root cause: Connector and splice losses, plus patch panel wear, reduce margin below the vendor’s tested budget.
Fix: Re-measure end-to-end loss and include worst-case patch paths in your 800G planning model.
2) Mistake: Ignoring switch firmware optics profiles.
Root cause: The port may accept the module physically but mis-handle DOM thresholds or lane mapping, causing link instability.
Fix: Match firmware to the module vendor compatibility list and validate DOM alarms during the pilot.
3) Mistake: Underestimating thermal and airflow constraints.
Root cause: High-power optics plus restricted airflow can push the module near temperature limits, increasing BER and retrains.
Fix: Confirm airflow paths, check module temperature telemetry, and run a burn-in test under realistic load.
Cost & ROI note for 800G planning
Budgeting is typically the fastest way to get burned if you ignore TCO. OEM 800G optics often cost more upfront, while third-party modules can reduce capital expense but may introduce higher compatibility and failure risk. In practice, operators should model not only purchase price but also spares strategy, return logistics, and the labor cost of troubleshooting optics-related instability.
A realistic TCO view: the cheapest optics rarely stay cheapest if they cause repeated maintenance windows. For planning, keep a small spare pool of the exact part numbers you deploy, and track failure rates by module vendor across airflow zones.
FAQ
What does 800G planning require beyond buying faster optics?
You need a port-by-port matrix that ties fiber type, measured loss, switch firmware compatibility, and DOM telemetry expectations. Treat optics as part of the control and monitoring system, not just the data path.
Which fiber type should I assume for short versus long links?
Short links often use MMF with high-lane MPO/MTP style optics, while longer spans use SMF optics matched to reach and dispersion limits. Confirm your plant loss with patch-level measurements and include connectors and splices.
How do I validate that a transceiver is truly stable in production?
Run a staged rollout, then verify link stability after warm restarts and monitor error counters and DOM optical power trends. Do this under realistic traffic patterns, not just link-up tests.
Is DOM support mandatory for 800G planning?
It is strongly recommended. DOM telemetry enables faster fault isolation and prevents “silent degradation” scenarios where thresholds do not trigger alarms as expected.
Should I mix vendors for optics to reduce cost?
It can work, but it increases validation effort. If you mix vendors, ensure switch firmware compatibility for each exact part number and keep spares aligned to reduce operational risk.
What is the biggest operational failure mode we should watch?
The most common high-impact issues are lane-level instability and firmware/profile mismatches that cause retrains or error spikes. The pilot stage with DOM and error-counter verification is your best defense.
That is the practical playbook we used for 800G planning: match optics to fiber reality, validate DOM and firmware behavior, and scale only after measured stability. Next, see Data center fiber loss budgeting for a disciplined way to compute link budgets and avoid last-minute surprises.
Author bio: I have led hands-on optics and transport upgrades in live data centers, coordinating staged rollouts, DOM validation, and field troubleshooting