SFP Module Testing: OTDR and Power Meter Guide
In modern fiber networks, Small Form-factor Pluggable (SFP) modules are the workhorses that enable reliable, scalable, and cost-effective communications. To ensure peak performance, field technicians and network engineers rely on precise testing methods. Two essential tools in the SFP testing toolbox are the Optical Time Domain Reflectometer (OTDR) and the optical power meter. Together, they provide a complete view of the link’s health: where losses occur, the quality of the connectors, and the overall link budget. This guide walks you through practical, technical steps to test SFP modules using OTDRs and power meters, with an emphasis on real-world workflows, accuracy, and best practices.
Understanding the Roles: OTDR vs. Power Meter
- OTDR: An OTDR sends a series of light pulses into the fiber and analyzes the backscattered signal to reveal reflections, splice losses, connector losses, and overall fiber length. It is ideal for establishing a trace of the fiber plant and identifying structural issues that affect SFP performance over long distances.
- Power Meter: A power meter measures the optical power level at a given point in the link. When paired with a reference/_calibrated_ power source or a reference receiver, it helps verify the SFP’s transmission and reception thresholds, affronts gross losses, and confirms proper link margins at the module level.
Using both tools allows you to diagnose problems at the SFP level (end-face quality, insertion loss) and the fiber plant level (backscatter, splices, connectors). This combined approach is essential for ensuring compliance with SFP specifications, maintaining link budgets, and speeding up field returns.
Setup Essentials: Preparing Your Testbed
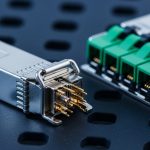
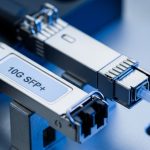
- Equipment checklist: OTDR with appropriate wavelength options (1310 nm, 1550 nm, or multi-wavelength), high-precision optical power meter with calibrated references, reference adapters (APC/UPC, connectors, and lancing tools), clean fiber cleaning supplies, SFP modules to test, test cables, and a stable test platform or rack.
- Module and fiber compatibility: Ensure the OTDR wavelength aligns with the SFP’s operating wavelength (e.g., 1310/1550 nm for typical single-mode SFPs). For multimode SFPs, use the correct mode-specific settings if supported by the OTDR.
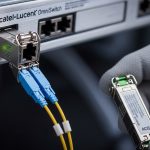
- Launch and receive fibers: Use short, known reference fibers (launch and capture cables) to isolate connector and end-face losses from the fiber under test. This helps isolate SFP performance from connector-induced variability.
- Power meter reference: Calibrate or verify the power meter with a known reference power or use the SFP’s datasheet reference levels. Maintain consistent units (dBm) and ensure the meter’s wavelength range matches the SFP emission.
OTDR-Based Testing for SFP Modules
- Trace acquisition: Connect the OTDR to the fiber run via the launch cable, insert the SFP module into a test fixture when possible, and select the correct wavelength and range. Use a short dead zone by adjusting pulse width and averaging to minimize noise.
- Identify key features: Look for reflective events (splices, connectors) and non-reflective losses. A clean trace with a smooth slope indicates low loss along the fiber; abrupt jumps typically indicate connectors or faults.
- Evaluate SFP insertion and end-face losses: The OTDR cannot directly read the SFP’s end-face loss, but it can reveal excess loss at the near end when using launch cables. Compare traces with a known-good reference to quantify insertion loss introduced by the SFP and adapters.
- Determine link budget implications: From the trace, derive total fiber loss, connector losses, splice losses, and any fault locations. Compare the calculated budget against the SFP’s specified output power, receiver sensitivity, and the link distance to ensure adequate margin.
- Best-practice tips:
– Use a high dynamic range setting to capture weak reflections.
– Employ multiple pulse widths to resolve close events and shallow events.
– Record both the reference trace (with a known good fiber) and the test trace for comparison.
Power Meter Testing: Verifying SFP Transmission and Reception
- Transmitter (TX) power check: Connect the fiber to the SFP transmitter via a launch cable or a test fixture. Measure the launched power at the fiber output and confirm it lies within the SFP’s specified output power range. If the measurement is outside tolerance, investigate connector cleanliness, adapters, or a faulty SFP.
- Receiver (RX) sensitivity check: To assess receive performance, use an accurate optical source with known power and wavelength to test the SFP input. Compare the reflected power at the SFP RX to the module’s specified receiver sensitivity or a known reference. A failing RX may indicate a defective SFP, misalignment, or fiber issues.
- Power vs. distance insight: By plotting power levels along the link, you can spot abrupt power drops that indicate connector or fiber issues, enabling targeted maintenance rather than blanket replacements.
- Return loss and de-emphasis considerations: Some power meters support return loss measurements; use this to identify high-reflection points. De-emphasis or PAM-4 variants may require specialized meters or test configurations—verify capabilities before testing.
Practical Testing Workflow: Step-by-Step
- Baseline verification: Clean all connectors, insert a known-good SFP into a reference module, and measure baseline TX power and RX sensitivity with a power meter and a reference receiver. Record the power levels and trace in a consistent template.
- OTDR trace against baseline fiber: Run an OTDR trace on the fiber with the launch cable in place. Compare against a baseline trace captured from a known-good fiber.route to identify new faults or changes in loss distribution.
- SFP insertion loss assessment: After ensuring fiber integrity, insert the SFP into the test fixture, re-run OTDR if needed, and measure any changes in the trace near the connector where the SFP attaches. Calculate insertion loss based on reference and test readings.
- TX power validation: Use the power meter to measure the launched power from the SFP. Confirm it is within the manufacturer’s specified range for the given wavelength and temperature range. If out of range, recalibrate or replace the SFP.
- RX validation and margin check: Apply a stable test signal at the RX input. Verify the received power level at the SFP RX and ensure it is above the receiver’s minimum sensitivity. Check for margin under expected link conditions.
- Documentation: Save traces, power measurements, and environmental conditions. Maintain a change log for maintenance, replacements, or re-terminations to support future troubleshooting.
Common Pitfalls and How to Avoid Them
- Dirty connectors: The most frequent source of loss and misleading OTDR events. Clean with proper alcohol-free wipes, and use lint-free swabs. Re-test after cleaning.
- Incompatible launch conditions: Hidden end-face losses can appear as high insertion loss. Use short launch and capture fibers to isolate these effects.
- Wavelength mismatches: OTDR wavelength must align with SFP emission. Mismatches yield inaccurate traces and misinterpretation of losses.
- Inadequate averaging or pulse width: Inadequate averaging reduces SNR, obscuring small reflections. Balance resolution and dynamic range with the target length and event spacing.
- Temperature drift: Optical power and sensitivity shift with temperature. Record ambient temperature and verify under field conditions that performance remains within tolerance.
Interpreting Results: Making Data-Driven Decisions
With both OTDR traces and power measurements, you gain a holistic view of the SFP link. Look for:
- Consistent loss budgets across the link that align with SFP specs and fiber characteristics.
- Unexpected reflective events indicating connector deterioration, improper polishing, or damaged end faces.
- Disparities between TX power and RX sensitivity suggesting a potential need to replace the SFP or re-terminate the fiber.
- Trace changes over time that may signal aging connectors or degrading fiber splices.